Looking to migrate your website from Squarespace to WordPress? Squarespace is an excellent website builder to kick off your website project without having to learn HTML, CSS, or programming. However, while Squarespace is a good starting point for beginners to build a site, users often transfer their site to WordPress once they understand the limitations of the platform.
WordPress is the most flexible website builder in existence. WordPress makes it easy to customize the appearance and expand the functionalities of your site even for non-tech savvy users.
In this article, we’ll show you how to properly move your website from Squarespace to WordPress.
Here’s a list of steps we’ll cover in this guide:
- Getting Started with WordPress
- Installing WordPress
- Exporting Squarespace Content Using the Built-in Export Tool
- Importing Content to WordPress
- Importing Images
- Fixing Permalinks
- Importing Content Manually From Squarespace to WordPress
- WordPress Best Practices to Follow After Site Migration
Why Should You Move From Squarespace to WordPress?
Squarespace makes it simple to create a website. With its exhaustive list of templates and hundreds of customizable features, it’s easy to give your website a unique look. Plus, its user interface is intuitive, making the platform stand out from the competition.
However, as you grow your site and your needs evolve, you may want to enhance your site with additional features. That’s when you’ll undoubtedly start noticing the limitations of the Squarespace platform.
For instance, some of these Squarespace limitations include:
Limited Set of Features:
When building a website, you want to be able to add as many features as you need. For example, you might want to install Google Analytics on your site to track your visitors’ interactions. Unfortunately, this isn’t possible on Squarespace because they don’t allow you to add any third-party scripts on your site.
Restricted eCommerce Features:
As you grow, you may want to integrate a storefront onto your site for selling your merchandises. Squarespace’s storefront feature is limited, which means you can’t build a professional eCommerce store on the platform.
Fewer Design Choices:
Being able to easily choose a website design that matches your brand perfectly is important. But Squarespace doesn’t offer every type of template, instead the templates they provide are curated, all with the “Squarespace” look. Plus, they offer fewer choices than other website builders.
On the other hand, WordPress is a highly-flexible platform that allows you to build any type of website, any way you want. Not only can you customize the look and feel of your site, but you can also extend its functionalities as easy as installing the right plugin.
Learn more about the differences between Squarespace and WordPress.
Let’s take a look at how to switch your website from Squarespace to WordPress.
Step 1: Getting Started with WordPress
When you use Squarespace, you’re hosting your website on Squarespace’s servers. Your Squarespace subscription fee covers the hosting charges as well as the fee for the builder and other expenses.
Conversely, the core WordPress software is free to download and use. However, you’ll have to purchase web hosting and install WordPress on your web hosting account.
There are multiple types of hosting include VPS hosting, dedicated server, cheap hosting, blog hosting, etc.
We recommend using Bluehost for hosting your WordPress website, as they’re official WordPress.org recommended partners.

Typically, running a WordPress site on Bluehost will cost you less than what you pay for running your site on Squarespace. To save even more initial expenses, we’ve worked out a deal with Bluehost to offer our users a free domain name, free SSL, and over 60% off on WordPress hosting.
Click Here to Claim This Exclusive Bluehost Offer »
If your Squarespace site has its own domain name, then you may want to transfer that domain to your new web host as well.
During and after the domain transfer, you will be able to access your Squarespace website, as it will start using the built-in Squarespace subdomain.
Step 2: Installing WordPress
After signing up with a web host, the next step is to install WordPress.
One of the main benefits of using Bluehost for hosting your WordPress site is that it comes with 1-click WordPress installers. This makes getting WordPress on your hosting account easy, and you won’t have to go through the tedious setup process.
Here’s how to install WordPress on your Bluehost account:
After subscribing to your hosting plan, you’ll be prompted to choose a WordPress theme. You can pick just about anything during this step because you can always change your theme later (we’ll show you how to do so in a later step of this tutorial). The most important part is to start building your blog, so go ahead and choose any theme for now, just to get you rolling.

You’ll be then asked to choose the name and tagline for your blog.
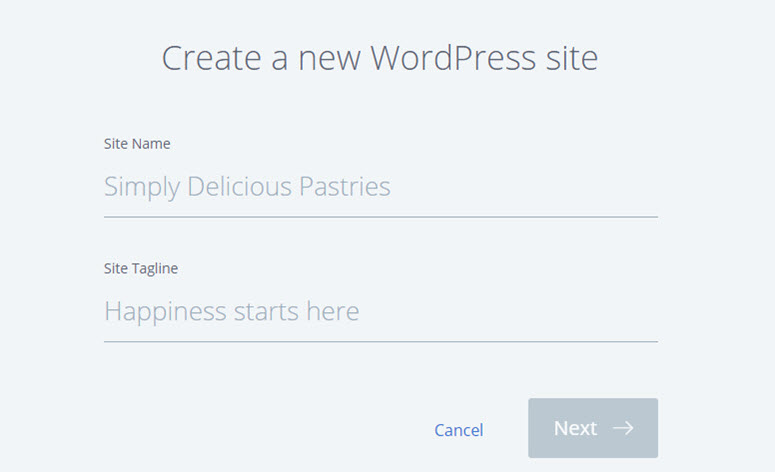
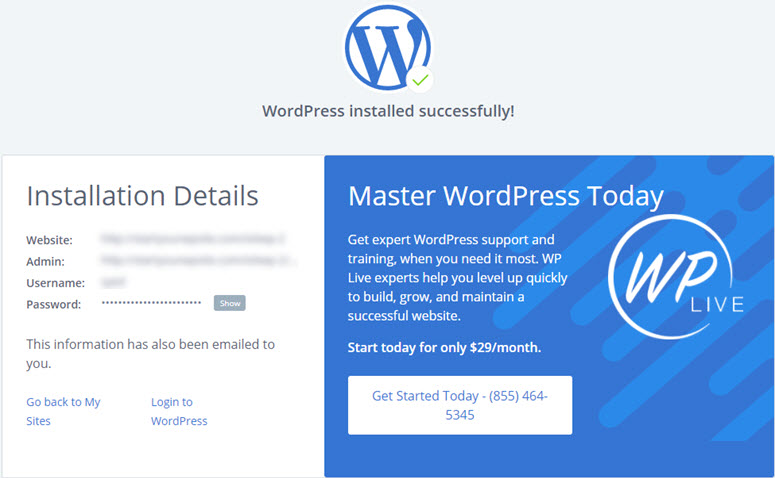
After specifying the details, click Next. Bluehost will now automatically install WordPress for you. Once it’s done, it’ll show you a screen like this:
You can log into your site by appending wp-admin to your URL. Here’s what your WordPress login URL should look like:
http://example.com/wp-admin
You can now log into your WordPress blog with the credentials sent to your email address.
Step 3: Exporting Squarespace Content Using the Built-in Export Tool
Now that you’ve set up your web hosting account and installed WordPress on it, the next step is to export your content from Squarespace.
The export functionality of Squarespace is limited. It doesn’t allow you to export your entire website’s content from the platform, so you’ll have to manually copy some of your content to your newly-installed WordPress website.
Here’s the list of content you can export using the built-in export tool on Squarespace:
- The basic pages
- Your main blog page
- All the recent blog posts included in your blog page. (The rest of your blog posts have to be copied manually).
- Gallery pages
- Text, image, and embed blocks
The following content should be exported manually:
- Product, album, and event pages
- Audio, video, and product blocks
- Style changes and custom CSS
- Folders and index pages
- All blog posts excluding the ones that appear in your main blog page.
In this step, we’ll show you how to export all your exportable content from Squarespace.
Log into your Squarespace account and go to Settings » Advanced » Import/ Export menu.
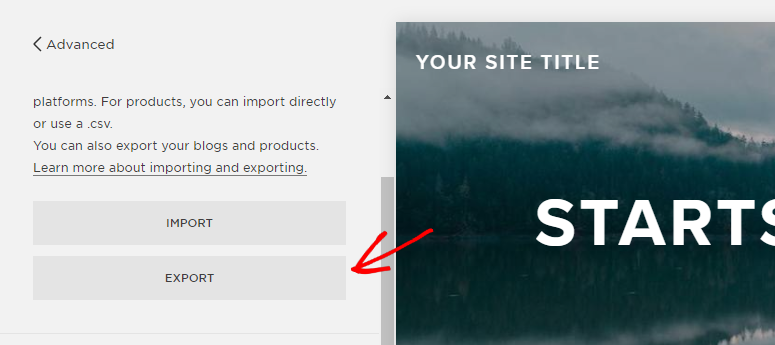
Then click the Export button to continue.
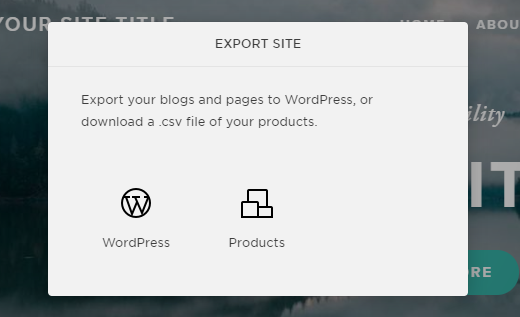
This will trigger a modal popup where you’ll be asked where you want to export your content. Simply click on WordPress.
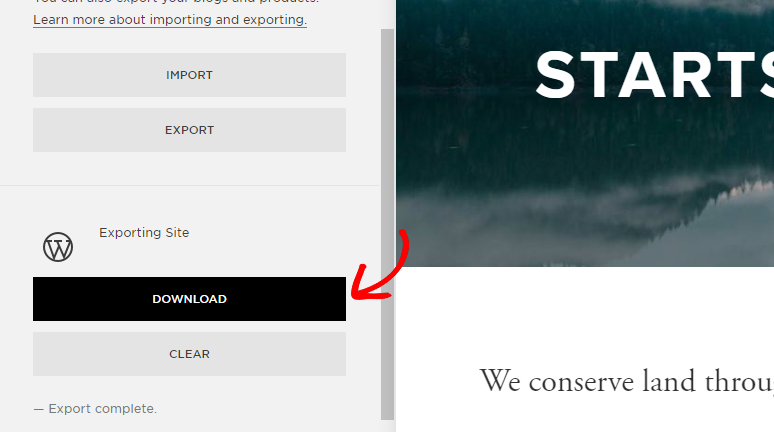
When the export file is ready, you’ll be given an option to download the file. Click Download.
Step 4: Importing Content to WordPress
The next step is to import the content you’ve downloaded from Squarespace into your WordPress site.
Log into your WordPress dashboard and head over to Tools » Import.
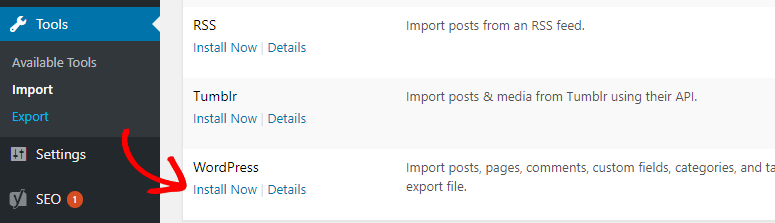
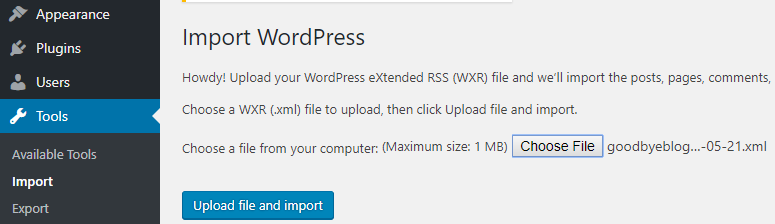
On the Import page, you won’t find Squarespace in the list of platforms. Since Squarespace has exported your content in a WordPress-compatible XML file, click the Install Now button below WordPress.
After the plugin is installed, click Run Importer.
You can now choose the XML file you just downloaded from your Squarespace account and then import it into your WordPress dashboard.
WordPress can also import Squarespace users and add them as subscribers on your WordPress site. You can then choose an existing admin user as the author or even create a new user.
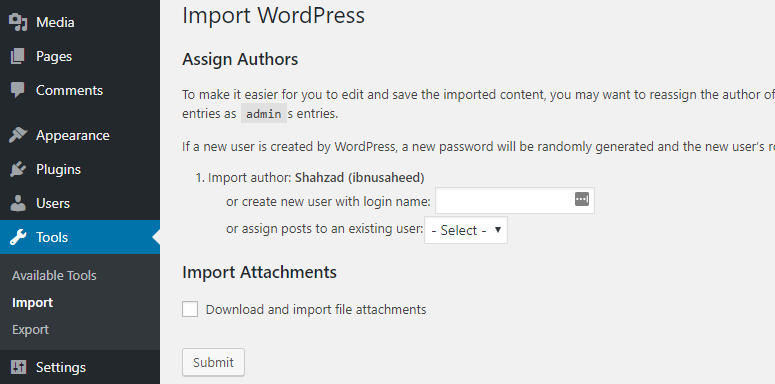
Though there is an option to import attachment images, it didn’t work during our migration process. Click Submit and WordPress will start importing content from your Squarespace file.

Once it’s done, you’ll see a success message. You can now visit the pages and posts within WordPress to review the imported content.
Step 5: Importing Images
By default, Squarespace doesn’t allow you to export images through their built-in export tool. You’ll have to manually import the files into your WordPress site.
Fortunately, there are a lot of WordPress plugins in the repository that allow you to easily import external images into your site. In our tutorial, we’ll be using the Import External Images plugin.
To import your image files into your newly installed WordPress site, install and activate the Import External Images plugin.
After activating the plugin, visit the Media » Import Images page to import images.
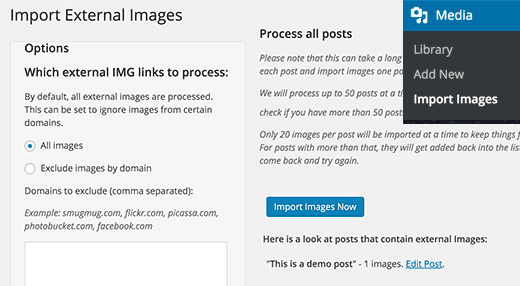
Now, all you have to do is click the Import Images Now button.
For more detailed instructions, you can read the tutorial on how to import external images in WordPress.
Step 6: Fixing Permalinks
It’s important to keep your permalinks intact, so you don’t lose traffic coming through the links from your old Squarespace website. The good news is that WordPress is so flexible that you can set the permalinks structure the way you prefer.
In this step, our goal is to set up the link structure similar to your Squarespace website. Squarespace uses year/month/day/post-name as the link format for blog posts. It also uses a prefix like blog or blog-1 in the post URLs.
Here’s what a blog post URL looked like on your Squarespace platform:
https://www.example.com/blog-1/2018/3/6/post-title
To set up your WordPress permalinks, go to Settings » Permalinks. Now, choose the Custom Structure option and insert the structure below in the appropriate field:
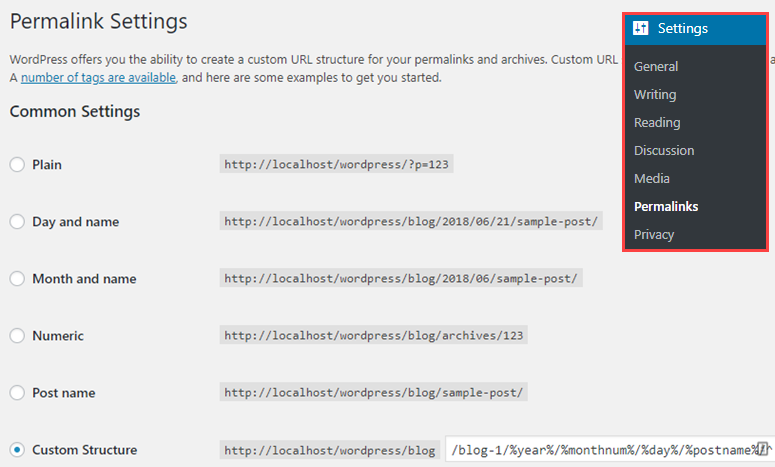
/blog-1/%year%/%monthnum%/%day%/%postname%/
Then click Save Changes to set up your new permalink structure for your blog posts. That way, you can keep your permalinks intact without losing search engine juice and referral traffic to your existing blog posts.
That being said, chances are you may still encounter 404 errors on your WordPress site after migration. Learn how to track 404 pages and redirect them in WordPress.
Step 7: Importing Content Manually From Squarespace to WordPress
Since Squarespace comes with limited export functionality, you’ll have to import some content manually like eCommerce and event pages, audio and video files, etc. to your WordPress site.
This can be tedious depending on how much content you have hosted on your Squarespace platform.
If you’ve integrated an eCommerce storefront in Squarespace, you can use a WordPress eCommerce plugin like WooCommerce. For hosting video files, we recommend using third-party hosting services like YouTube or Vimeo rather than self-hosting them.
For other content, check out these guides:
- How to add a portfolio to your WordPress Site
- How to create a photo gallery with albums in WordPress
- How to start a podcast with WordPress
- How to add audio files and create playlists in WordPress
That’s it. Also, check out these Squarespace alternatives and competitors.
WordPress Best Practices to Follow After Site Migration
Now that you’ve completed transferring your Squarespace site to WordPress, the next thing you’ll want to do is to follow WordPress best practices to keep your website secure and grow your audience.
Before you choose a random free theme for your site, take a look at our list of top WordPress themes and decide which one would be the best choice for your needs.
Upon migration, below are a few things you need to do immediately on your new WordPress website:
- Contact form: Add a contact form to your WordPress website. You may also want to check out the best WordPress contact form plugins.
- Add Google Analytics tracking: Add Google Analytics tracking on your new WordPress site by installing the MonsterInsights plugin.
- WordPress security: Provide bulletproof security to WordPress by installing some of the best WordPress security plugins.
- Improve WordPress SEO: Boost your SEO by using the best WordPress SEO plugins.
- WordPress back up: Schedule a backup of your WordPress site with the best WordPress backup plugin.
- WordPress performance: Improve your WordPress performance by installing the best WordPress caching and other WordPress performance plugins.
- Prevent spam comments: Prevent spam comments by installing the Akismet plugin on your site.
- Grow your website: Grow your visitors and customers by using the best WordPress lead generation plugins.
We hope this article helped you move from Squarespace to WordPress. For more detailed steps, read how to start a WordPress website from scratch (step by step).
This tutorial does not work. When I try to use the image import plugin it says none available. When I import my exported squarespace file it adds the content to wordpress pages, but still loads a blank 2019 theme.