Looking to build an online appointment booking system? Managing appointments for your services can be a hassle. By setting up an appointment booking system, you can allow your clients to easily schedule appointments on your website without your involvment.
In this article, we’ll show you how to make an appointment booking system with WordPress.
Choosing an Appointment Booking Plugin for WordPress
With all the different appointment booking plugins out there, making an appointment booking system with WordPress is easy. For the best results, you can either choose BirchPress or WPForms for appointment scheduling.
BirchPress is the best choice if you need a complete appointment booking plugin for your site. It lets you manage your appointments directly from your WordPress dashboard.
You can choose WPForms if you want to integrate your appointments with your favorite standalone appointment booking platform. WPForms is a complete online form builder. With its Zapier integration, you can connect your appointment booking form with any web application that supports Zapier.
Here’s a tutorial on how to make a client booking form with WPForms and manage your appointments with Google Calendar for example.
In our tutorial, we’ll be using BirchPress for making an appointment booking system with WordPress.
Getting Started with an Appointment Booking System
To set up an appointment booking website with WordPress, you’ll have to purchase a domain name and web hosting.
A domain name is your website’s address on the internet, like Google.com and IsItWP.com and web hosting is where your website content files are stored online.
We recommend you start your website on Bluehost, one of the best hosting providers in the world. They’re also an officially recommended hosting provider by WordPress themselves.
We’ve worked out a deal with Bluehost to offer our users a FREE domain name and over 60% off on web hosting. With Bluehost, you can start your website for as low as $2.75 per month.
Click Here to Claim This Exclusive Bluehost Offer »
Step 1: Install and Configure BirchPress
The first thing you’ll need to do is install and activate the BirchPress plugin. After the activation, head over to the plugin settings by navigating to Appointments » Settings and start configuring your booking system.
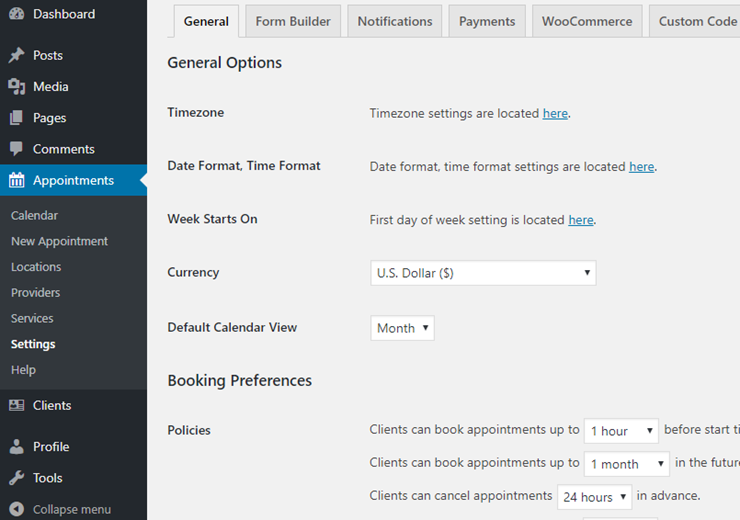
In the settings page, you can find a few different sections:
- General: Customize general options including time zone, currency, default calendar view, and so on.
- Form builder: Here, you can customize your appointment forms.
- Notifications: Set up a notification to service providers and your clients. Emails are sent when an appointment is booked, rescheduled, or canceled.
- Payments: In the Payments tab, you can set up your payment settings. BirchPress allows you to collect payments via PayPal. For more payment gateways, you’ll need to install WooCommerce integration.
- WooCommerce: Enable WooCommerce integration in this section.
- Custom code: Add custom code to your BirchPress plugin.
Step 2: Add Your Locations
If you offer your service at multiple locations, then you can manage appointments for all your locations from your WordPress admin. All you have to do is add locations in BirchPress and allow users to choose the correct location when they book an appointment.
To add a location, go to Appointments » Locations. Then click Add Location.
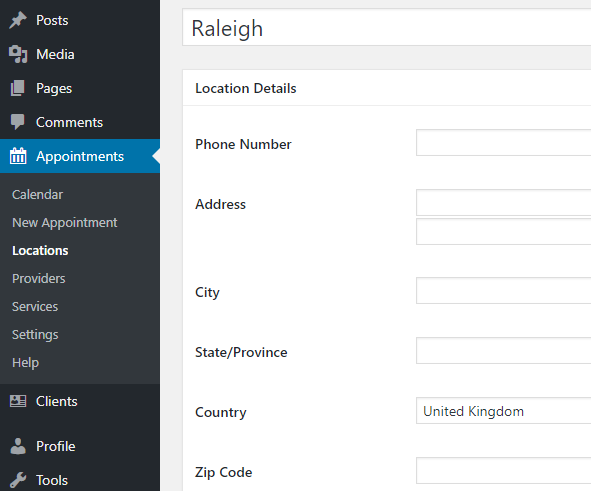
Then, you can specify more details about your location, including phone number, address, zip code, etc.
You’d like to check out our article on best business phone services and systems.
Step 3: Add Service Providers
Next, you’ll want to add service providers or your staff. If you’re a solopreneur, then you only have to add yourself as the service provider.
If you want to manage appointments for your entire firm for, say, your tax consultancy business, then you’ll need to add each consultant in your booking system.
Adding providers in your booking system is easy. Navigate to Appointments » Providers and specify the details of your providers.
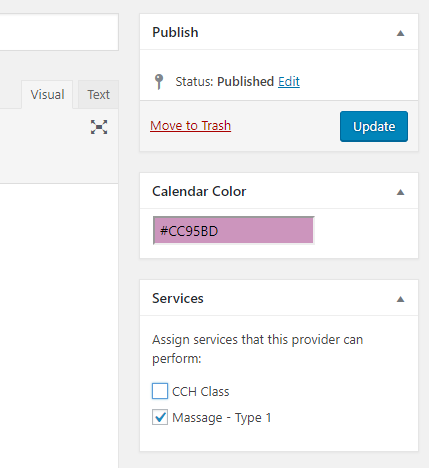
You can specify the name and description of each provider in the editor. Then assign the services each provider can perform in the Services box. When you scroll down the page, you’ll see several meta boxes, as follows:
- Additional Info: Specify the email address of the provider.
- Calendar integration: BirchPress works with the calendars you already have, including Google, iCal, iPhone, Android, and Outlook. You can import and sync your appointments automatically.
- Days off: Specify your days off in the calendar
- Work schedule: Choose a city and add a schedule for each provider.
Step 4: Add Your Services
To add a service in BirchPress, go to Appointments »Services and specify your details. On the right-hand side, you can specify the locations where you’ll be performing this service and the providers who can handle it.
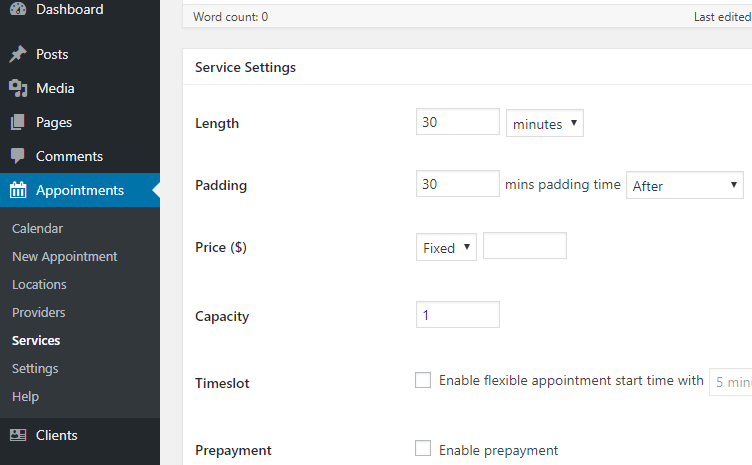
Then, scroll down the page and adjust your service settings per your needs.
Step 5: Publish Your Booking Form
Now that you’ve set up all the details regarding your services, it’s time to publish your appointment booking form.
A booking form can be embedded in a page post and widgets via shortcode. Once it’s published, your clients can easily check your availability and book appointments online easily.
To publish a booking form, create a new page in WordPress. Then add the following shortcode to the editor wherever you want to embed the form: [bpscheduler_booking_form]
Alternatively, you can add an appointment directly from your WordPress dashboard by going to Appointments » New Appointment.
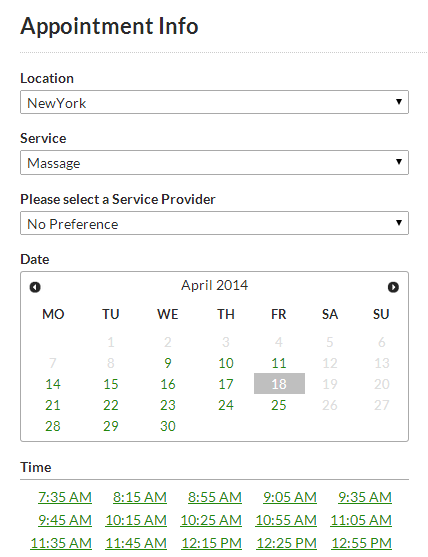
Here’s what a sample booking form looks like:
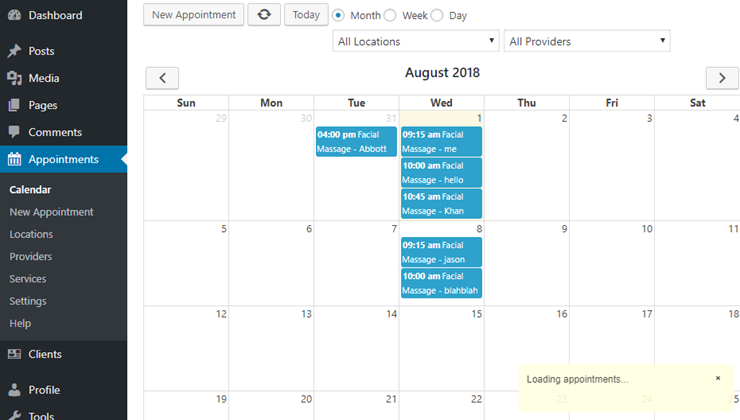
You can also check out the calendar to view and manage your bookings by visiting Appointments » Calendar.
That’s it!
We hope this guide helped you make an appointment booking system with WordPress. For more plugins, you can check out our guide on the best appointment booking plugins.

Comments Leave a Reply