
Do you want to create a backup of your WordPress site? A backup can save you from losing your data and you can restore your website from it if you should ever need to.
There are a lot of different plugins that allow you to create a backup of your site, such as the ever-popular UpdraftPlus and Backupbuddy. In this article, we’ll show you how to easily back up your WordPress site using these 2 plugins.
Why Do You Need to Back Up Your WordPress Site Regularly?
As a WordPress user, it’s critical for you to back up your WordPress files and databases regularly to a secure location. In case data loss happens due to an accident, malicious attack, or other catastrophe, making regular backups can be a lifesaver.
That way you can easily restore your files and databases, even if your entire website gets hacked, corrupted, or erased.
You should also read this guide on the importance of creating regular backups in WordPress.
We recommend you save these backups to multiple locations. If any of your backups are corrupted, then you have another one to recover your site easily.
If you have a content heavy website and you add new content regularly, then you may need to set up automated backups. However, if you don’t update your WordPress site very often, then you can create manual backups using a WordPress backup plugin. Of course, you’ll need to choose the right plugin that fulfills your requirements for creating and restoring your WordPress backups.
Before we start, you’ll need to know which WordPress files you should back up:
- Core WordPress files
- Files in the wp-content folder (themes, plugins, and uploads)
- WordPress configuration files
- WordPress database
Let’s take a look at how you can easily back up and restore your WordPress site completely without losing any files.
Method 1: Creating Automated Backups Using the BackupBuddy Plugin
Using BackupBuddy is one of the best ways to create automated backups in WordPress. Their premium plans start from $80 and offers 1 year of plugin updates, 1 year of support, 1 GB storage at Stash, 10 iThemes Sync sites, and more. This plan is valid for 1 full site backup plus 1 bonus license that sums up to 2 licenses.
Installing BackupBuddy Plugin
The first thing you’ll need to do is to install and activate the BackupBuddy plugin. For more details, see our step-by-step guide on how to install a WordPress plugin.
Once activated, you’ll need to follow the instructions on the plugin page and add your BackupBuddy license to continue getting automatic updates over the year.

The alternate way to verify your license is by visiting the Settings » iThemes Licensing page in your WordPress admin area and enter your iThemes username and password. From there, click on the License Products button and it will automatically verify your license.

Once your license is activated you can go ahead and set up automated backups.
Automating Backups in WordPress
BackupBuddy stores your backups in Stash automatically. Their basic premium plan comes with the Stash Live feature which helps you maintain real-time backups for your site.
You don’t need to exert any effort to create the backup and update it in the storage system. The real-time backups automatically save your WordPress site changes to your Stash Live storage.
Now that you’ve got the most up-to-date backup version of your site saved consistently, you’ll need a system that can help you restore your site should an incident ever occur.
Stash Live offers the facility to restore your WordPress blog in one-click. You need to go to the BackupBuddy » Stash Live page in your WordPress admin area and enter your iThemes credentials.
It will ask you for an email address to send backup notifications. You’ll get a link to zip downloads in your email inbox.

Make sure to click on the Save settings and start backup button.
You can see the backup status progress on your screen. BackupBuddy will create your first backup and store it on Stash automatically.

If you have a large site, then it will take a few hours to complete the backup for the first time. BackupBuddy will upload the backup automatically to Stash Live.
You can go ahead and continue working on your WordPress site. The backup will continue in the background without disruption.
After the backup is completed, it will send you a notification on your provided email address. You can also access your Stash Live page to see the snapshots of your backup files.
These snapshots should be left “as is” on Stash Live, so you can restore your site any time. However, you can also download the snapshots onto your computer or transfer them to your own server with the one-click feature in Stash Live.
If you don’t want to store real-time backups on Stash Live, then you can also set up scheduled backups in WordPress using BackupBuddy.
For more details, you can visit this complete guide on how to create automated backups in WordPress.
Method 2: Creating Manual Backups Using the UpdraftPlus Plugin
Similar to BackupBuddy, you can create automated backups with UpdraftPlus. However, it also allows you to create manual backups easily.
The best part of using UpdraftPlus for manual backups is that it’s available for free in the WordPress plugins repository. They also have a premium version that comes with additional features.
First thing you need to do is to install and activate the UpdraftPlus plugin. For more details, see our step-by-step guide on how to install a WordPress plugin.
Upon activation, you need to visit Settings » UpdraftPlus Backups page in your WordPress admin area and go to the Settings tab to choose your remote storage location.
There are multiple storage services available with UpdraftPlus. You can save your backups to Dropbox, Google Drive, Microsoft OneDrive, any many others. You can also send your backups to an email address.
You’ll need to choose a remote storage service, and it will display the instructions below to set up the remote storage.

Simply configure the remote storage location settings to continue. You can also check this guide to set up remote storage with UpdraftPlus.

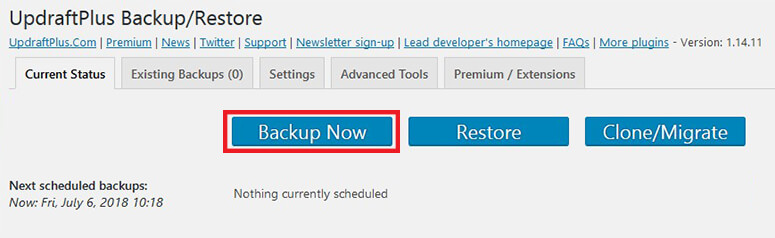
Make sure to click on the Save Changes button. Next, you need to go to the Current Status tab and click on the Backup Now button.
A modal popup will appear where you’ll be asked to choose the files/database you want to backup.

Click on the Backup Now button in this popup and the backup progress bar will appear on your screen. It will take some time depending on the size of your WordPress files.

Your backup files will also be uploaded to the remote location you chose.
Restoring Your Backup Files With UpdraftPlus
Restoring your backup with UpdraftPlus is as easy as creating the backup itself.
You can restore your backup with just a single click.
You can restore your backup if:
- your WordPress site was hacked.
- your website has crashed and you’re seeing a white screen of death.
- You want to fresh start on a new domain.
To restore, you’ll need to go to the Settings » UpdraftPlus Backups page in your WordPress admin area and click on the Restore button.
It will take you to the Existing Backups tab and scan the /wp-content/updraft/ folder in WordPress to search for any existing backups.
Note: If you deleted these website files, then there will be no existing backups available.
You can then upload the backup files from your computer to manually restore your WordPress site.

Since you set a remote storage location to upload the backups, UpdraftPlus will automatically scan the remote storage and show the existing backups.
You’ll need to click on the Restore button next to the backup you desire.

A popup will open that asks what you want to restore from the backup. Simply choose all the available options and click on the Restore button.

Your WordPress files will be restored from the backup available from your remote storage location.
Both the UpdraftPlus and BackupBuddy plugins can help you create automated and manual backups of your WordPress site easily. Backups come in handy in case data loss happens due to an accident, security breach, etc. Even if you set up backups, you can still be a victim of hacking and security threats.
We recommend you use Sucuri to save your site from hackers, malware attacks, and other threats. You should also read our complete Sucuri review for more information.
We hope this article helped you easily back up your WordPress site. If you liked this article, then you may also want to check our expert picks for the best website builders for beginners to build your site quickly.

Comments Leave a Reply