
Do you want to create branded email accounts from your domain name? After purchasing your domain name, you’ll have the opportunity to get associated email accounts with it. Using an email address branded with your domain name is a great way to give off professional vibe to your potential customers. You can even create multiple email accounts associated with your domain, so your team members can better represent your brand.
In this article, we’ll show you how to properly create email accounts for your domain name and use them to send emails.
Why Should You Create Email Accounts for Your Domain Name?
Most email addresses you’ll see end with gmail.com, live.com, aol.com, etc. These email addresses are great for personal use, but aren’t recommended for businesses, or anyone else looking to portray a professional image.
First of all, if your name is relatively common, then you most likely won’t get your desired email address. You’ll end up adding numbers or additional letters to your email address (ex: dan.brown321@gmail.com) which doesn’t look professional. In fact, it looks downright spammy.
If you have a business then you’ll need a simple email address that represents yourself and your company name.
You can achieve that by creating email addresses for your domain name. Check out this example:
Your Domain Name:
www.example.com
Your Email Address:
dan.brown@example.com or dan@example.com
From the above example, you can easily see the difference between a personal and a professional email address. Emails sent using your own domain name will quickly gain the trust of your users, and it’s a great way to conduct business-related communication.
Setting Up Email Accounts for Your Domain Name
To create business email accounts, you’ll need a domain name and web hosting.
Note: If you already have a domain name and web hosting, then skip to the next step.
Step 1. Register a Domain Name and Web Hosting
You can check out the top domain name registrars to purchase your professional business name online. Not only can you buy a domain name, but these registrars will also suggest other business name options.
After getting your domain name, you’ll need to connect it with a web hosting account. You’ll need to do this before you can create email accounts for your domain name.
We recommend using Bluehost for web hosting. It’s the most popular hosting company in the world.
For IsItWP users, they’re offering a free domain name, a free SSL certificate, and a massive discount on web hosting.

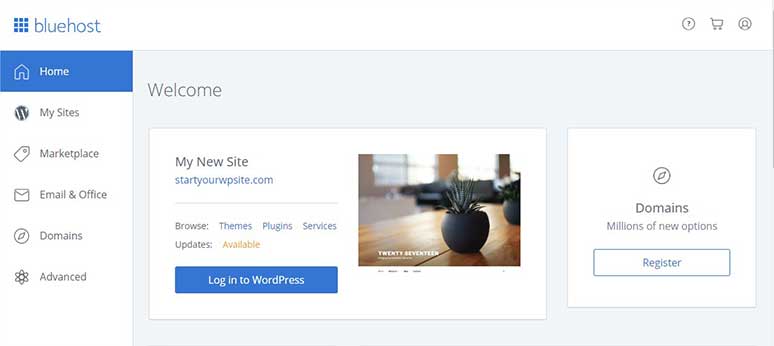
Once you have your domain name and web hosting, you’ll need to log into your Bluehost account to create your email accounts.
Step 2. Log Into Your Hosting cPanel and Create Your Email Accounts
First, you’ll need to log into your cPanel account. If you’re using Bluehost, then the cPanel will look like this:
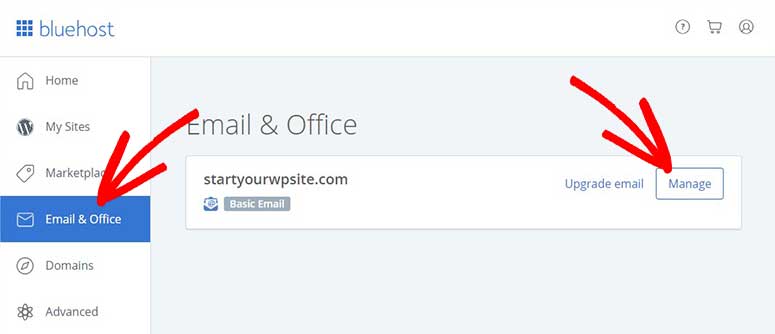
You’ll need to click the ‘Email and Office’ tab from the left-hand navigation menu and click on the ‘Manage’ button to get started.
On the next page, you’ll find multiple tabs. Under the ‘Add Email Account’ tab, you can enter your desired account name. Try something like:
- dan@example.com
- info@example.com
- hello@example.com
In the above example, ‘dan,’ ‘info,’ and ‘hello’ are the usernames and ‘example.com’ is your business/domain name.
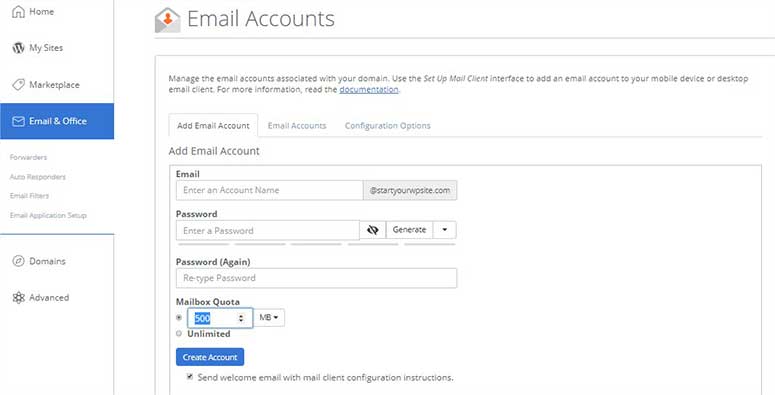
Make sure that you don’t enter your domain name in this field as it’s already there. You don’t want to end up as ‘dan@example.com@example.com!’
After choosing your account name, you can enter a secure password. If you can’t think of a secure enough password, Bluehost will offer to generate a random password for you which you can save before continuing.
Next, you can add the Mailbox Quota. This quota depends on your hosting plan and we recommend you leave it as-is. By default, it’s set to 500 MB, which is a decent amount of space for an email account. You should have more than enough space; however, you can always increase or decrease it later, if needed.
Click on the ‘Create Account’ button to complete the process. You can make multiple email accounts for your domain name by repeating the above steps.
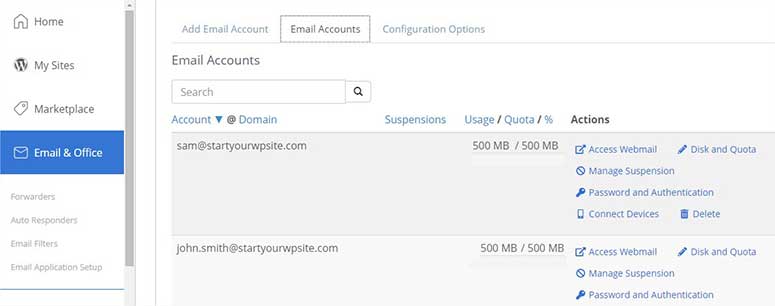
Once you’re done, simply go to the ‘Email Accounts’ tab to view all of the email addresses you created.
Step 3. Access Your Email Account
To access your email accounts, you can click on the ‘Access Webmail’ link next to an email address. It’ll open up an email client where you can see your new emails. You can also send emails from there.
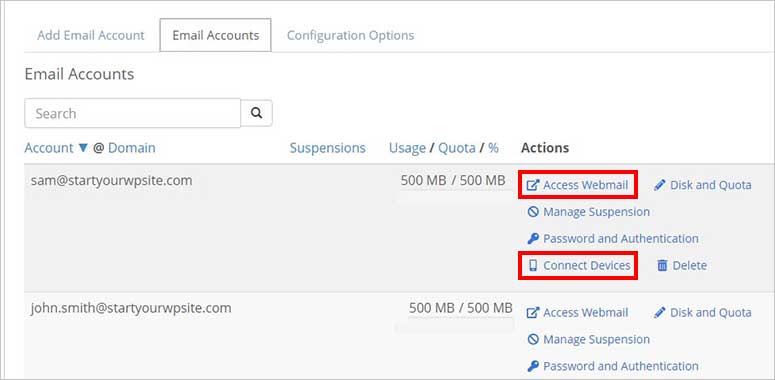
If you want to set up your email account on other devices, like your mobile phone, then click on the ‘Connect Devices’ link; and then click on the ‘Set Up Mail Client’ option.
It’ll display the information you need to configure your email account on all major applications/devices. Luckily, Bluehost offers automatic configurations to many apps and devices.
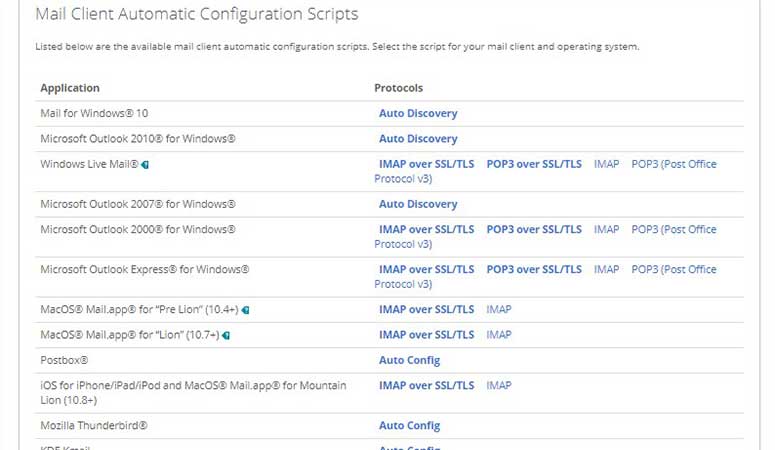
You can also find manual configuration options on that page for devices and applications that aren’t listed in the auto-config section.
Related: Best SMTP transactional email services.
Setting Up an Email Account with G Suite
Now that you have your email accounts, you can connect them with G Suite by Google Cloud and use them from there. It’ll make your emailing experience a lot easier than using webmail by Bluehost.
Why You Should Connect Your Email Account with G Suite
The email clients offered by Bluehost, or any other web hosting company, are not as simple or tidy as Gmail. Also, you won’t get additional apps like you will with G Suite. Webmail is a simple application to send and receive emails with no other features.
However, you may use G Suite daily on your laptop and phone. G Suite includes all the popular Google apps like Gmail, Google Photos, Docs, Drive, etc.
Once you connect your business email accounts with G Suite, you can access all their apps and features.
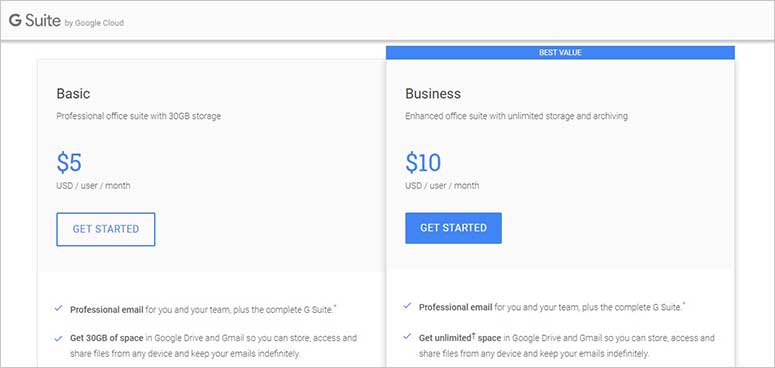
It’s a premium service which means you’ll need to pay an additional cost other than the cost of a domain name and web hosting, but it’s well worth the price. G Suite plans start from $5 per user / month. It’ll include resources separately for the number of accounts you purchase.
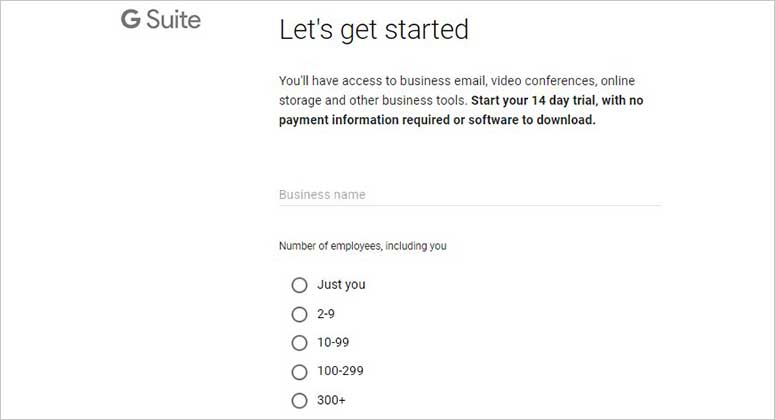
First, you’ll need to go the G Suite website and select a plan to get started.
On the next page, you’ll need to enter basic details about your business to continue.
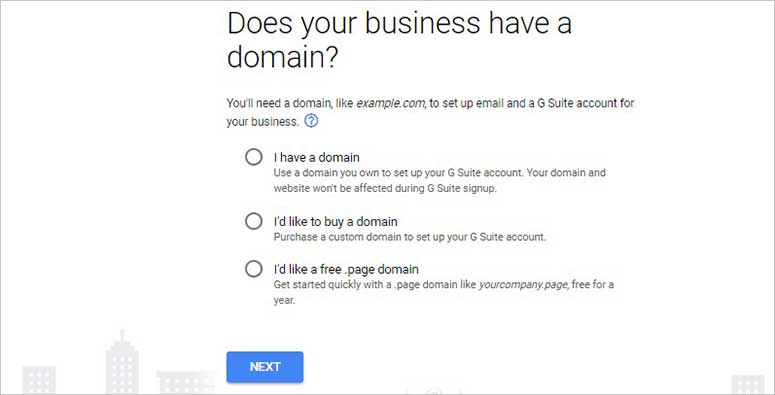
After that, you’ll be asked if you have a domain name. Since you purchased your domain name in the previous section, you can select the option ‘I have a domain’ and click on the ‘Next’ button.
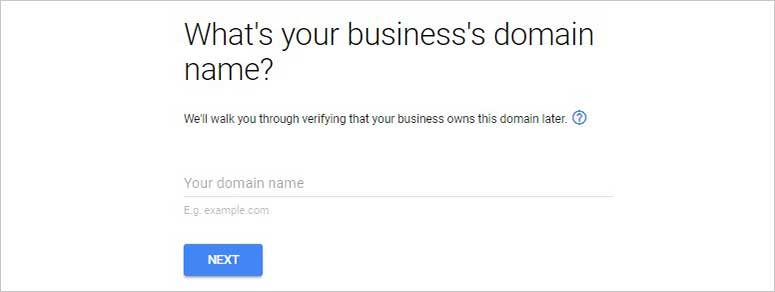
Now, enter your business name or domain name and click the ‘Next’ button again.
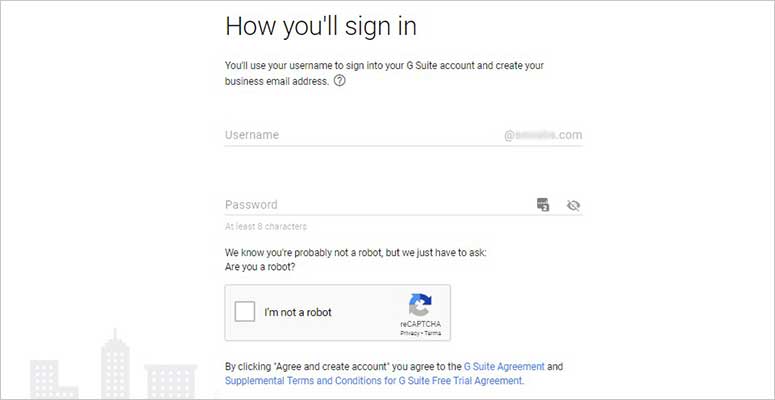
You’ll need to add a username and password. This username will be the account name for your email and it’ll be attached to your domain name (dan@example.com).
Once signed up, you’ll see a success message showing that your account was created. This will be your primary email account (administrator account) for your domain name.

Click on the ‘Go to Setup’ button to complete the account setup.
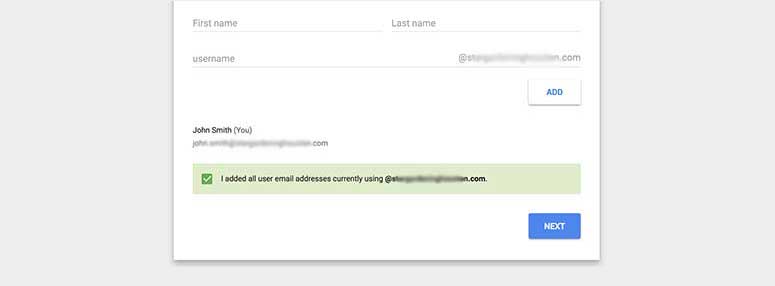
On the setup screen, you should add your team members or other users to create more accounts. Simply check the ‘I added all user email addresses currently using [this domain]’ option and click on the ‘Next’ button.
Note: If you have a single email account, then you can skip this step.
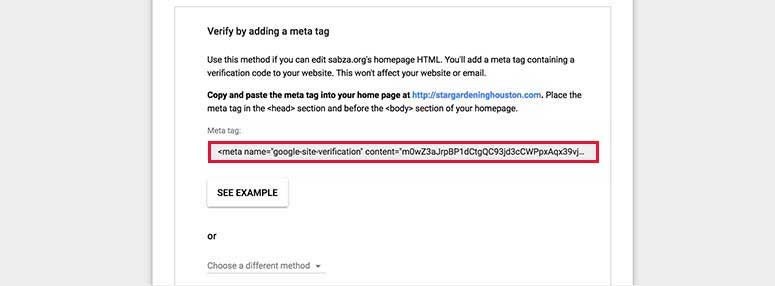
Next, you’ll need to verify ownership for your domain name.
Simply copy the meta tag, or upload an HTML file, to your hosting account for verification. Use only 1 method to verify domain ownership.
You’ll need to log into your website and install the Insert Headers and Footers plugin to do this. For more details, you can read our guide on how to install a WordPress plugin.
Once the plugin’s activated, go to Settings » Insert Headers and Footer and enter the meta tag in the ‘Scripts in Header’ text area.
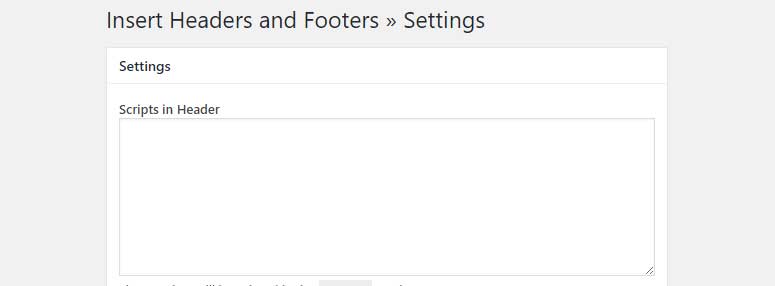
Click on the ‘Save’ button and go back to your G Suite page to check ‘I added the meta tag to my homepage’ option.
You’ll also need to enter MX records for your domain name to make the G Suite functional for your email accounts.
The process of adding the MX records is quite similar for any domain name registrar. Since we’re using Bluehost, we’ll walk you through adding the entries in your Bluehost account.
Log into your Bluehost hosting account and visit the ‘Domains’ page from the left-hand navigation menu.
From there, you’ll need to select your domain name and click on the ‘Manage DNS records’ link on the right side.

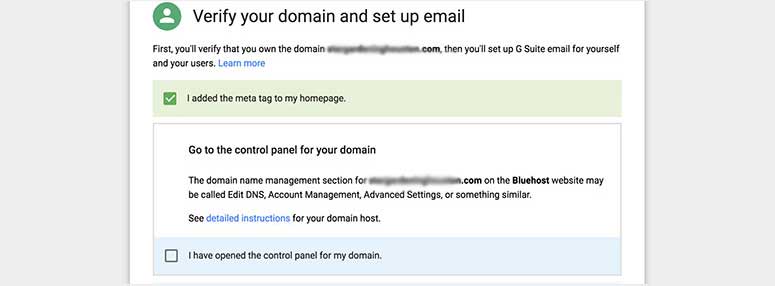
Go back to G Suite’s website and check ‘I have opened the control panel for my domain’ option. You’ll now see the MX record entries that you can copy from there.
Now, you can come back to your Bluehost account and enter the MX records.
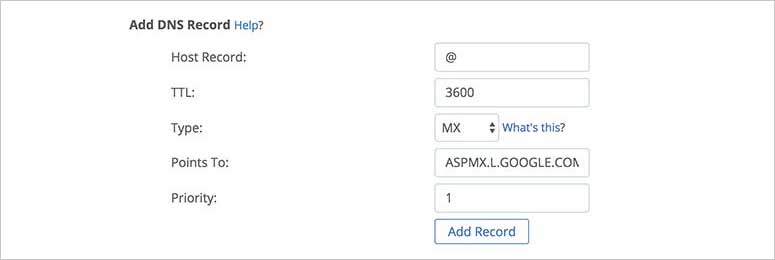
Click on the ‘Add Record’ button to continue.
After that, go to G Suite’s website and check ‘I created the new MX records’ option. You’ll also need to delete any existing MX record entries pointing to your domain name.
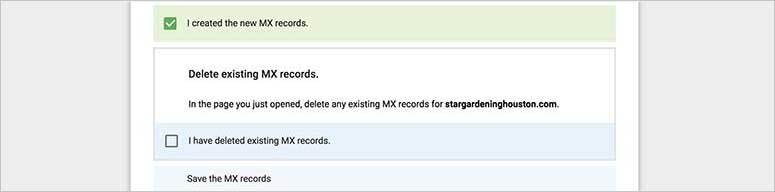
Once deleted, you’ll also need to save the MX records manually and check the ‘I saved the MX records’ option.
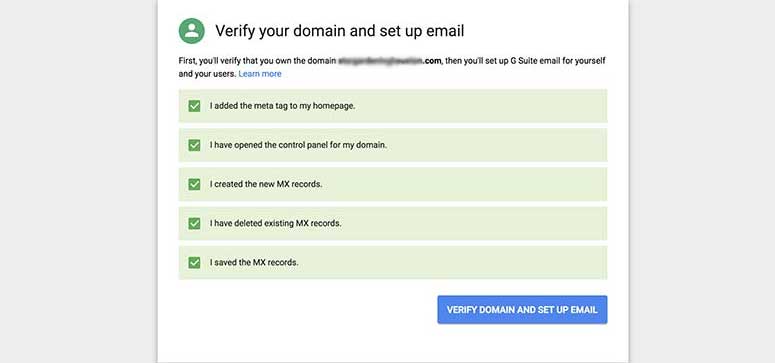
Last, click on the ‘Verify Domain and Set Up Email’ button to complete the process. For more specific details, you can follow our complete tutorial on how to create a business email with G Suite.
You can go ahead and log into your email account using Gmail or the G Suite website. As an administrator, you can also manage all additional email accounts for your domain name.
We hope this guide helped you learn how to create email accounts for your domain name. You may also want to check out our article on how to create a free business email in less than 5 minutes.

Comments Leave a Reply