
Looking to create a popup form for your website? That’s a fantastic idea! Few things convert visitors to subscribers, followers, and customers than popup campaigns.
That’s why, in this article, we’re going to show you how to create a popup form the easy way, step-by-step.
Why Create a Popup Form?
When it comes to growing your email list, popup stays way ahead of the curve compared to any other types of optin forms. With popups, users have seen their conversions increase by as much as 600%.
However, some users don’t like popups because of its intrusive nature. People hate popups when they’re being shoved into reader’s faces whenever they visit your site.
This is why you need a clever popup solution like OptinMonster. OptinMonster is the best WordPress popup plugin that lets you easily create any type of optin forms, including a popup form. Best of all, you can control every aspect of your popup campaign from how and when it triggers to who it’s shown to. That way, you can grow your email list without being intrusive.

And, of course, it has seamless integration with all the most popular email marketing services like MailChimp, Constant Contact, Drip, etc.
There are a vast number of templates available, so you can get started immediately, without having to build your popup from scratch (though you can if you want to!).
To get it, head to OptinMonster’s official website and sign up. Don’t forget to use our special code SAVE10 at checkout to get 10% off just for being an IsItWP reader!
1. Build Your Campaign
Log into your OptinMonster account. From there, you’ll be taken to your dashboard. Get started by clicking the green Create Campaign button.

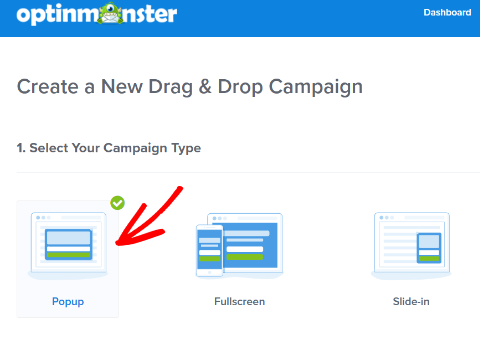
Next, you’ll be asked to choose a campaign type. Click Popup since you want to create a popup form.
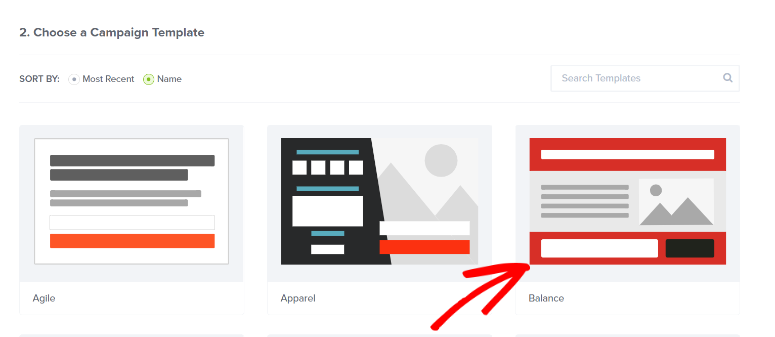
Select your favorite campaign template to get started. Simply hover over the design you like best and click Use Template. For this tutorial, we’re using the Balance template.
From there, you’ll be asked to name your campaign and choose which of your websites you’d like your popup form to appear on. Once you’ve filled out the fields, click the Start Building button.
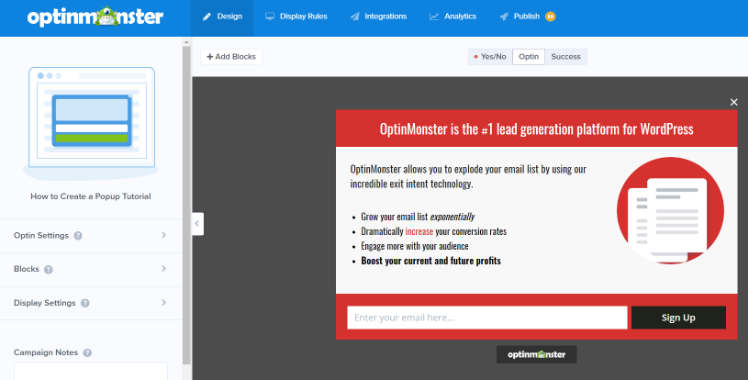
Like magic, you’ll be taken to the campaign builder. You’ll see the default version of whatever template you chose. Since we chose Balance, this is what it looks like:
Now you can begin tweaking the template to make it completely your own.
2. Customize Your Campaign
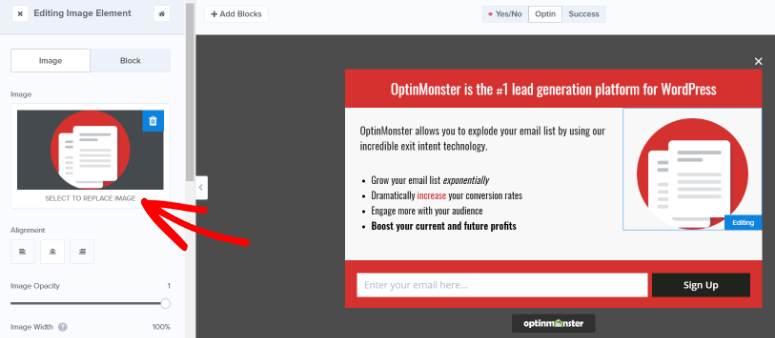
Every great popup has a great picture, so we’ll start there. Click on the default image to open the Editing Image Element section on the left. Then, click Select to Replace Image.
You’ll be able to choose an image from your existing image library (if you’ve uploaded anything before), or you can choose to upload a new image from your computer.
Once your image is looking fabulous, move onto the headline text. Simply click on it to select it. Once selected, an editing area will pop up on the left. Go ahead and write your own headline and fiddle with the text elements as needed. You can change the font, the size, the color, and anything else you want to make it perfect.
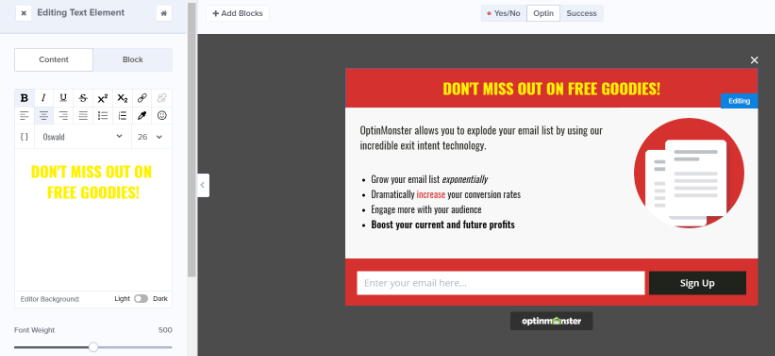
Next, follow the same steps to customize the body text.

Don’t forget to click the green Save button in the top right. Save as often as you need to throughout the building process to make sure you retain all your changes.

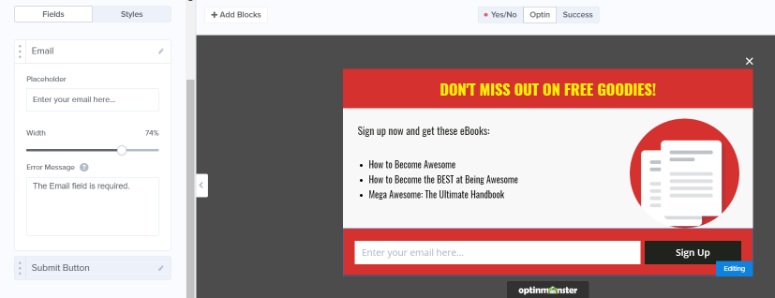
If needed, you can also change the look and text for your email optin field. Simply click on it to edit it, the same as everything else. There will be options on the left to change the field’s text as well as the color and style of the submit button.
Speaking of submissions… Now it’s time to connect your email marketing service to your popup!
Related: How to Submit a Form Without Page Refresh in WordPress
3. Enable Email Integration
Since most popup campaigns these days are used to gain leads and subscribers, this step is one of the most important.
OptinMonster integrates with all the most popular email service providers; however, for this guide, we’ll be using MailChimp.
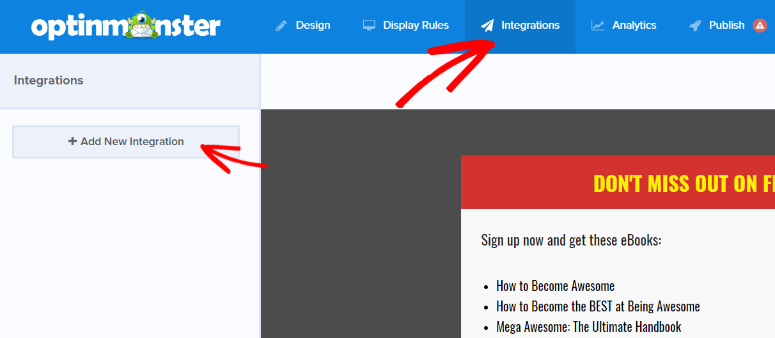
Start by clicking on the Integrations tab at the top of the screen, and then click Add New Integration on the left-hand side.
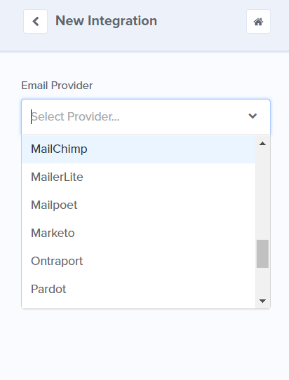
Select MailChimp from the dropdown menu.
Fill out the fields for your MailChimp account label and API. You can get these from your MailChimp account. If you need help with this aspect, simply follow the documentation provided by OptinMonster.
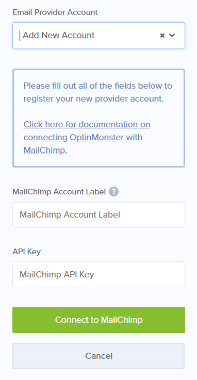
Then, click the green Connect to MailChimp button to continue.
You’ll then be asked to choose which of your lists you want your form for connect to. Click the one you want.
Bam! Email integration has now been completed. Onto the next step!
4. Configure the Display Rules
Click on Display Rules at the top of the page. From there, you’ll be shown a page that looks like this:
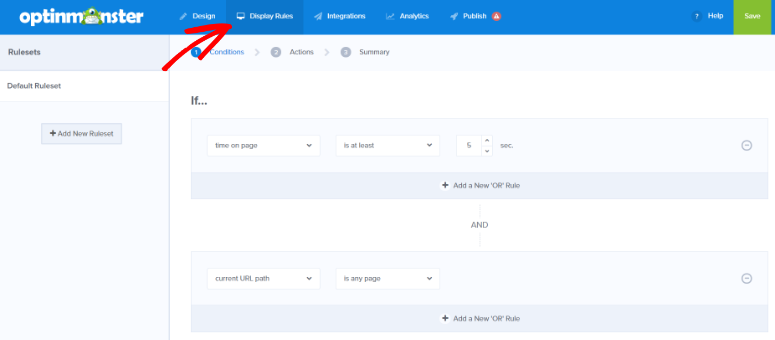
Configure your display rules however you like. Simply click through each section and fiddle with it until you’re satisfied.
5. Hit Publish
Now, it’s time to make your campaign live! Hit the Publish tab at the top of the screen. Then, click the toggle so it turns green and says LIVE.

Don’t forget to hit the Save button one last time!
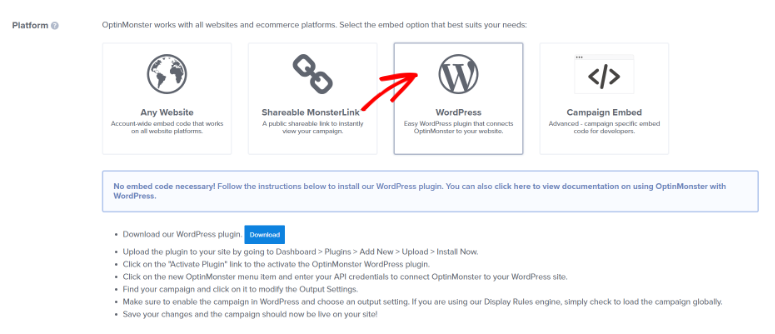
From there, scroll down to the Platform option. Select WordPress and then follow the instructions provided.
You’re nearly there! One step to go.
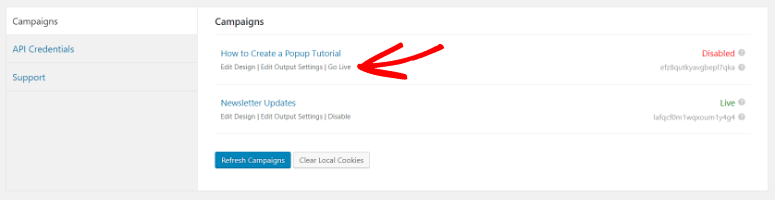
6. Make Your Popup Form Live on WordPress
Log into your WordPress dashboard. There should now be an OptinMonster tab on the left-hand side. Click on it to see a list of all your campaigns. If you don’t see the campaign you made, hit the Refresh button.

Once your campaign shows up, click the Go Live link.
That’s it! You’re done. Now, your popup form will show up on your website.
We hope this tutorial helped you learn how to create a popup form for your WordPress website.
If you found this guide useful, you might also like our list of the best plugins for marketers.

Comments Leave a Reply