Do you want to move your site or blog from WordPress.com to WordPress.org?
While WordPress.com might be a good entry point for you to get started with blogging, as your blogging needs evolve, you may want to switch over to self-hosted WordPress (WordPress.org) so you can have more control over your blog.
WordPress.org is a fully-featured content management system. Aside from giving you full control over your blog, WordPress.org lets you customize the look and feel of your blog the way you want, monetize it however you like, add third-party tracking including Google Analytics, and a lot more.
Read the full differences between WordPress.com and WordPress.org.
In this step-by-step tutorial, we’ll walk you through how to move your blog from WordPress.com to WordPress.org.
Here’s a list of the steps we’ll cover through this guide:
- Purchase a web host
- Install WordPress
- Export your content from WordPress.com
- Import your content into self-hosted WordPress
- Import your Blogroll links
- Set your WordPress.com blog to private
- Redirect visitors and preserve search rankings
- WordPress best practices to follow after site migration
- FAQs
Note: If you’re planning to switch domains, we’ve a complete guide on how to properly move WordPress to a new domain name.
Step 1: Purchase a Web Host
In order to move your site to a self-hosted WordPress platform, you’ll need to own a custom domain name and a WordPress hosting account. If you already have a custom domain set up on your WordPress.com site, you can keep the same domain name even after you move it.
Domain name: Your domain name is your site’s address on the internet, like Google.com or IsItWP.com. It’s what your customers type into their browsers to access your website. A domain name normally costs around $14.99 per year, but we’ll show you how to get it for free later in this article.
Web hosting: As you may know, WordPress.com is a free blog hosting platform, which comes with a lot of restrictions, like the inability to install plugins and limited customizability, etc. When you’re moving to a self-hosted WordPress site, you’ll have to purchase a hosting account. Your web hosting account is where your site’s content and files are stored.
Think of it as your new website’s house. When a visitor tries to access your site by typing your web address (domain name), they’ll be directed to the website files stored on your web hosting server. Web hosting typically costs $7.99 per month.
When you’re starting out with self-hosted WordPress, the combined cost of domain and hosting can seem like quite a lot.
That’s why we’ve worked out a deal with Bluehost to offer our users a free domain name, free SSL, and 65% off on WordPress hosting.
Click here to Claim this Exclusive Bluehost Offer »
Bluehost is one of the largest hosting companies in the world. They’re also an officially recommended hosting provider by WordPress.org.
To purchase a web hosting account, head over to Bluehost website and click the Get Started Now button.

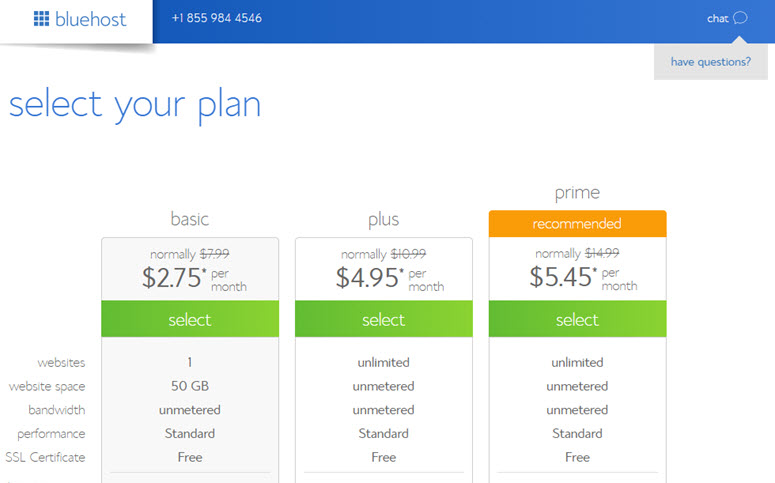
On the next page, you’ll now be asked to choose a plan. Since you’re just getting started, you can choose the basic plan that also includes a free domain and free SSL. You can always upgrade your account as your site grows.
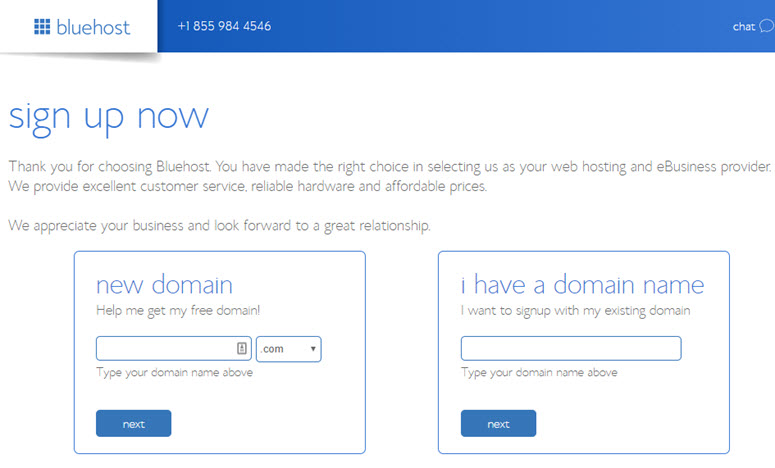
You can now either choose an existing domain you already own or purchase a new domain for free. If you weren’t using a custom domain on WordPress.com, we recommend getting a new domain since it’s free.
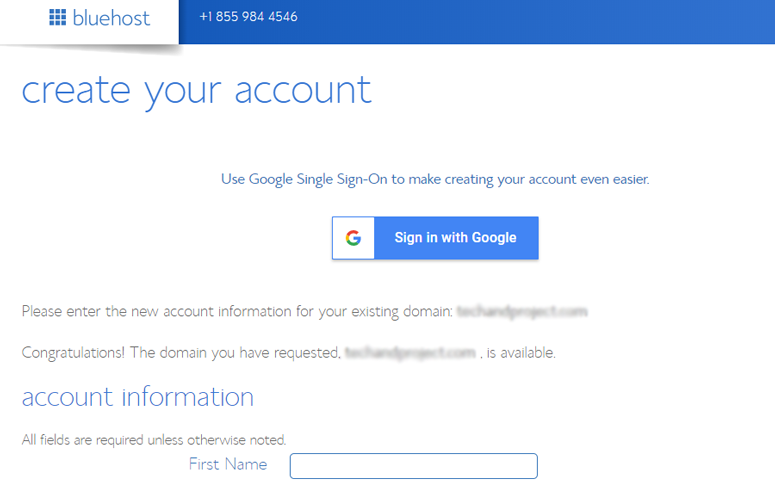
You’ll now be prompted to enter your account information. For easy registration, you can sign in with your Google login info with just a couple of clicks.
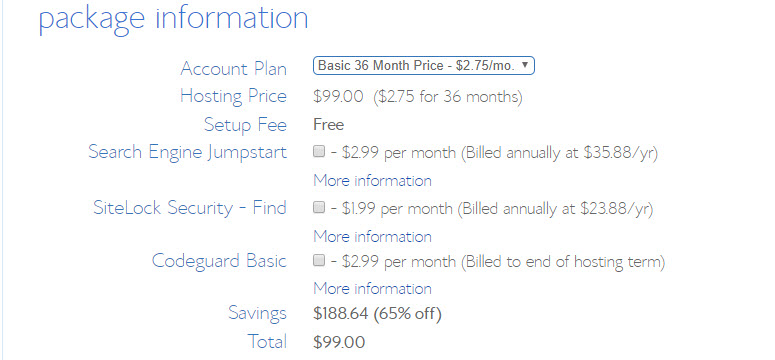
After entering the details, scroll down the page until you find the package information box. You can select the basic plan for 12 months, 24 months, or 36 months. To save money, you can uncheck the addons that are preselected by default. When starting out, you won’t be needing these addons. You can always add them later, if needed.
Note: Choosing the 36 months plan will get you the best value for your money!
Once you have configured your plan, scroll down the page further to enter your payment details. You’ll need to agree to their Terms of Service and then, click Submit.
That’s it!
You’ve successfully subscribed to a hosting plan. You will be asked to create a password for your account. After that, you’ll receive an email with details on how to log in to your web hosting control panel (cPanel) where you can manage everything from hosting files to emails and support.
Step 2: Install WordPress
After purchasing a web hosting account, the next step is install WordPress on it. You should also check out this article on why use WordPress.
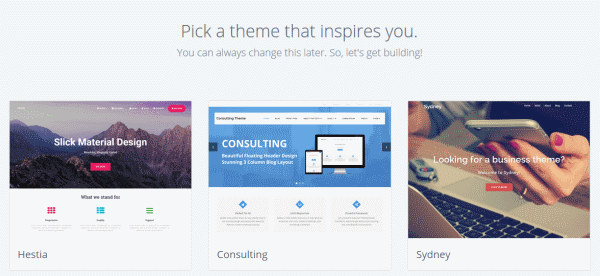
With Bluehost, you don’t have to go through a separate WordPress installation process because Bluehost now does it by default. All you have to do is choose your WordPress theme, specify the name and tagline for your blog, and you’ll be ready to get started with WordPress.
After subscribing to your hosting plan, you’ll now be prompted to choose a WordPress theme. You can pick just about anything on this step because you can always change your theme later.
You’ll be then asked to choose the name and tagline for your blog.
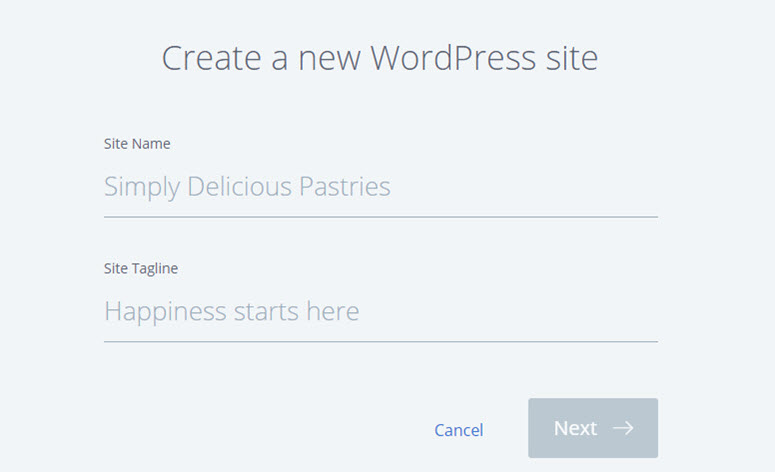
After specifying the details, click Next. Bluehost will now automatically install WordPress for you. Once it’s done, it will show you a screen like this:
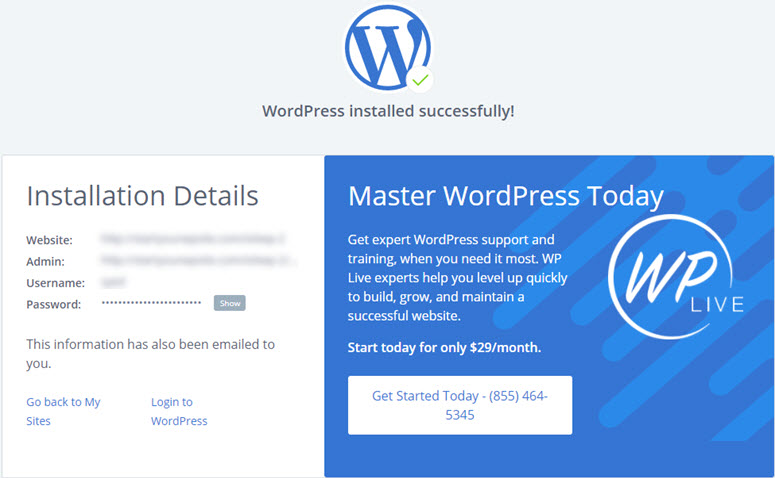
You can log into your site by appending wp-admin to your URL. Here’s what your WordPress login URL should look like:
http://example.com/wp-admin
You can now log into your WordPress blog with the credentials sent to your email address.
Step 3: Export Your Content From WordPress.com
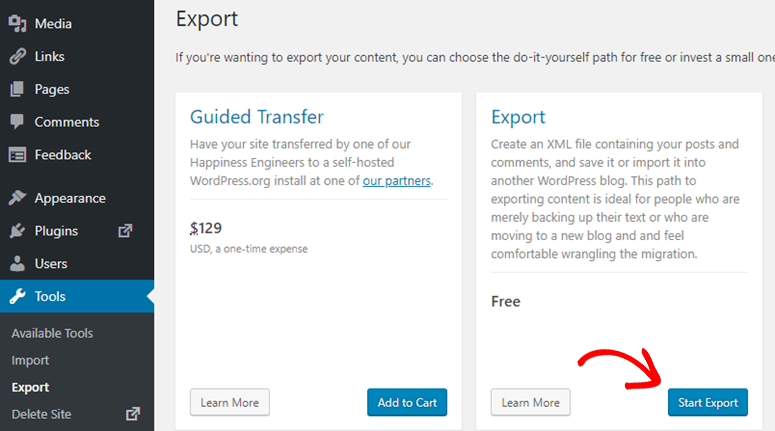
Log into your WordPress.com account and head over to your blog’s dashboard. Then go to Tools » Export.
You’ll be directed to a new page where you’ll be asked to choose between free or guided transfer. In the Export section, click Start Export.
Next, choose All content to export your entire content from WordPress.com and then hit the Download Export File button.
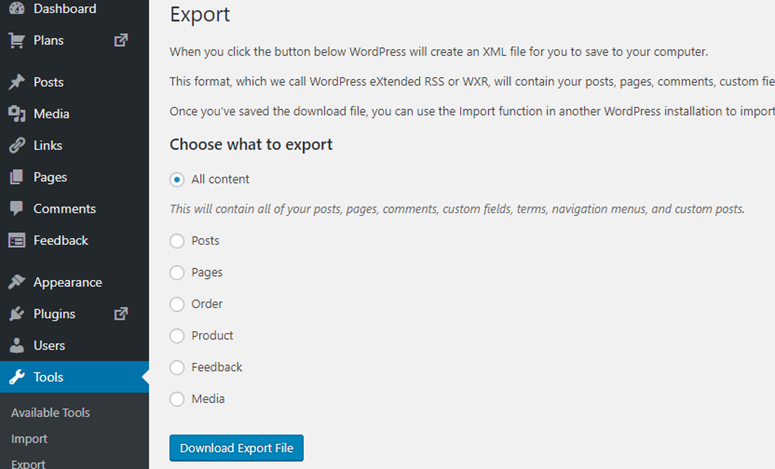
An XML file will be downloaded in your computer containing all your posts, pages, images, comments, custom fields, categories, tags, navigation menus, and other information.
Step 4: Import Your Content Into Self-Hosted WordPress
Now that we’ve exported your content from WordPress.com, the next step is to import them into your new site. Log into your new WordPress dashboard and go to Tools » Import.
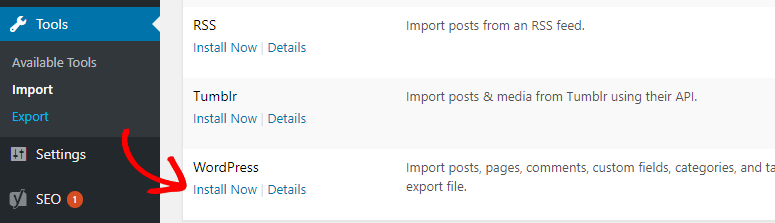
Next click on Install Now beside WordPress. This will install the WordPress importer plugin on your new site. Once it’s installed, click Run Importer to activate the plugin. It will take you to a page where you’ll be asked to upload the WordPress.com XML file that you downloaded in the previous step.
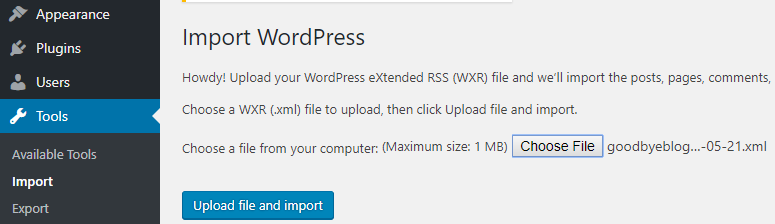
Choose the file and click Upload file and import.
Note: if your file size is larger than your upload limit shown on the page, then you have two options: You can either request your web hosting company to increase your upload limit temporarily or split your file by using a WXR file splitter.
After uploading, you’ll be prompted to import authors or assign posts to existing users. If you want to import attachments, select the checkbox, and click Submit.
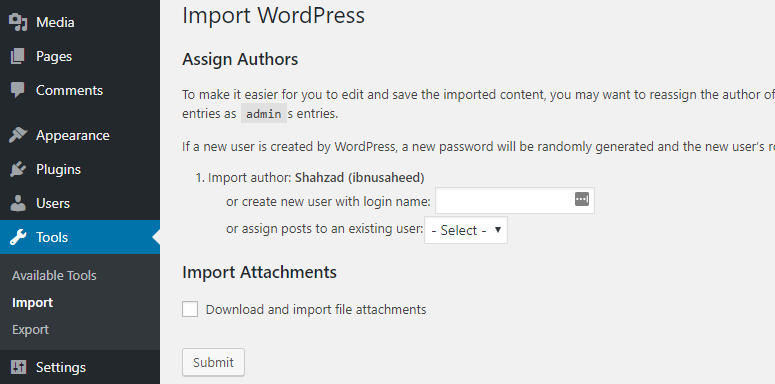
Once everything’s done, you’ll see a success message.

Step 5: Import Your Blogroll Links
If you’ve been using the Blogroll links feature in your old WordPress.com site, then you might want to import them onto your new site as well.
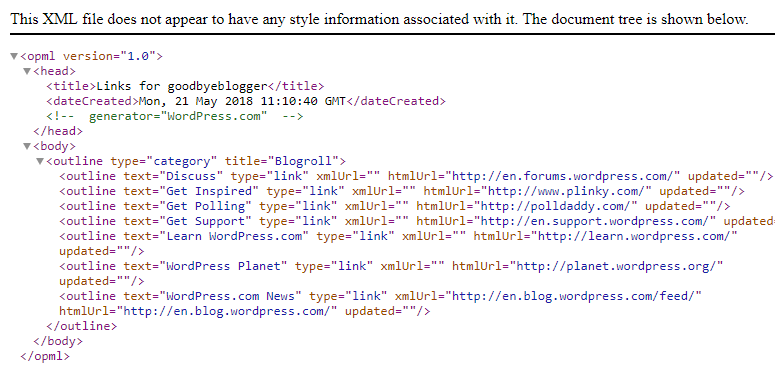
Blogroll links are exported in OPML format. It is an XML format that allows you to export and import your links and link categories. You can find your WordPress.com OPML file by visiting an address like this:
http://example.wordpress.com/wp-links-opml.php
Make sure to replace example with your WordPress.com blog’s subdomain. If you are already using a custom domain with your WordPress.com blog, then you might replace the entire domain as shown below:
http://www.example.com/wp-links-opml.php
Once your OPML file is opened in your browser, simply save the file on your computer by pressing CTRL+S (Command+S on Mac).
After downloading the OPML file, you need to import it into your newly-installed WordPress site.
By default, self-hosted WordPress does not provide a link manager like WordPress.com.
To enable links just like your WordPress.com site, you’ll need to install a plugin called Link Manager from the plugin repository.
The plugin hasn’t been updated in the last two years but you can confidently install it as it doesn’t need updating.
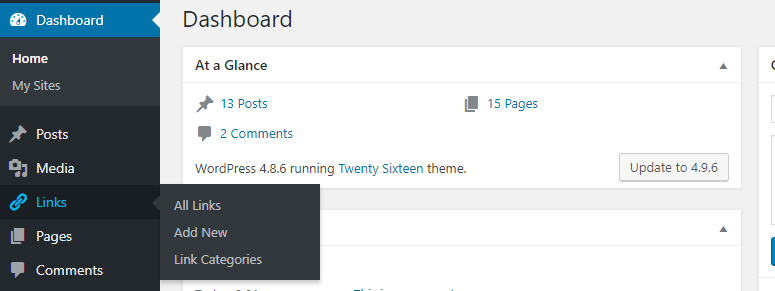
Upon activation, the plugin will add a new menu, Links in your WordPress admin bar.
Now, in order manage links and blogrolls of your WordPress.com site, you’ll need to import them into your WordPress site. Visit Tools » Import and click on Blogroll to install the OPML importer and then, click Run Importer.
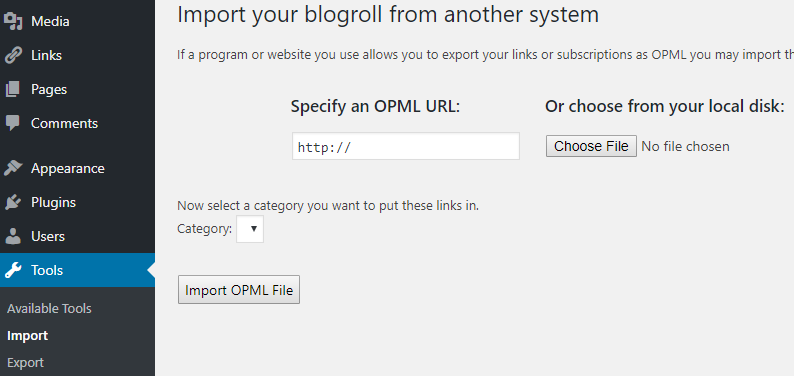
You’ll be prompted to upload the OPML file you saved earlier. After choosing the file to upload, click Import OPML File.
You’ll see a success message once all the links are uploaded.
Step 6: Set Your WordPress.com Blog to Private
Obviously, you won’t need to keep two separate sites with same content on both WordPress.com and self-hosted WordPress. You’ll either need to redirect all users to the new site or keep your WordPress.com site private, so it will be visible only to you and the users you choose.
In this step, let’s take a look at how to keep your WordPress.com site private.
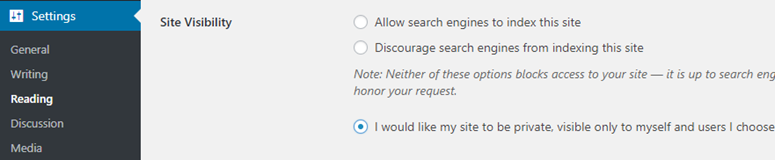
If you don’t want to redirect your old users to the new site, then go to Settings » Reading. Under Site Visibility, choose I would like my site to be private.
If you have been blogging for a while and have grown a loyal audience, then it doesn’t make sense to leave them hanging. Google and other search engines might also have indexed your site. You should keep both your search engine rankings and your old users intact on your new site.
We’ll show you how to redirect your visitors and preserve search rankings in the next step.
Step 7: Redirect Visitors and Preserve Search Rankings
Redirecting users to a new location with a 301 header is the standard solution to keep search rankings while moving a site from one location to another. With WordPress.com, you don’t have access to .htaccess, so you can’t make any changes on your own to retain search engine rankings. However, WordPress.com offers a paid upgrade, Site Redirect, which provides this functionality.
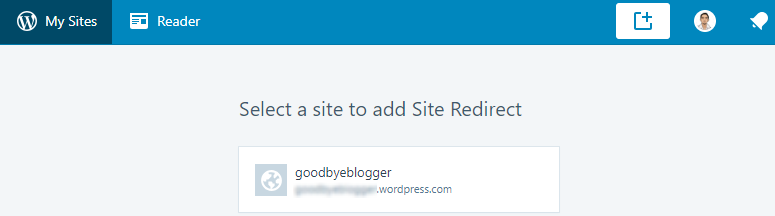
Go to the Site Redirect page on your WordPress.com account and select your old site to redirect.
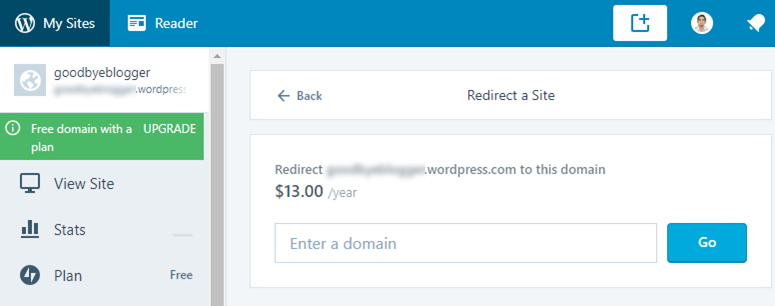
The redirect functionality is priced at $13 USD per year. This upgrade provides 301 redirect allowing your site’s visitors and search engines to be automatically redirected to your new site.
You might be wondering, “how long should I keep paying for this redirect feature?” The answer is as long as you want to. However, we recommend you to keep this feature for at least for 2 years. This way you’re giving enough time to your users to memorize your new domain name.
If you are changing domains, then another thing you want to do is update all in post URLs. If you’ve ever inter-linked your posts, then make sure to update those links in your new site.
WordPress Best Practices to Follow After Site Migration
Now that you’ve completed transferring your WordPress.com site to WordPress.org, the next thing you want to do is follow WordPress best practices to keep your website secure and grow your audience on the self-hosted WordPress platform.
Before you choose a random free theme for your site, take a look at our list of top WordPress themes and decide which one would be the best choice for your needs.
Upon migration, below are a few things you need to do immediately on your new WordPress website:
- Contact form: Add a contact form to your WordPress website. You may also want to check out the best WordPress contact form plugins.
- Add Google Analytics tracking: Add Google Analytics tracking on your new WordPress site by installing the MonsterInsights plugin.
- WordPress security: Provide bulletproof security to WordPress by installing some of the
best WordPress security plugins. You should also read out the ultimate WordPress security guide for more details. - Improve WordPress SEO: Boost your SEO by using the best WordPress SEO plugins.
- WordPress back up: Schedule a backup of your WordPress site with the
best WordPress backup plugin. - WordPress performance: Improve your WordPress performance by installing the best WordPress caching and other WordPress performance plugins.
- Prevent spam comments: Prevent spam comments by installing the Akismet plugin on your site.
- Grow your website: Grow your visitors and customers by using the best WordPress lead generation plugins.
Frequently Asked Questions (FAQs)
Having helped hundreds of users move their blog from WordPress.com to self-hosted WordPress.org, we’ve found that people ask the same sort of questions again and again. This is why we’ve compiled a list of frequently asked questions, so you can easily migrate your blog, hassle-free.
What happens to my WordPress.com subscribers?
To migrate your subscribers from WordPress.com to your self-hosted WordPress site, you’ll need to install the Jetpack plugin. Using Jetpack, you can transfer your subscribers by following this tutorial.
What are the costs of switching to WordPress.org?
WordPress is free. As described in the tutorial, to redirect your users and to keep your search ranking intact on your new site, you’ll have to subscribe to Site Redirect, for $13 per year for at least 2 years. Aside from that, you need to pay for you domain name and hosting account to run a self-hosted WordPress site. You can purchase a domain name for $14.99 per year and a hosting account for $7.99 per month. Altogether, running a site on a self-hosted WordPress platform will cost as low as $123.87 annually.
You can find thousands of free themes and plugins for your blog. However, if you prefer premium themes and plugins, the running cost of your blog may go higher.
I already paid WordPress.com, can I get a refund?
Yes! WordPress.com allows you to try out their paid plan risk-free for 30 days. If you’ve purchased their paid plan in the last 30 days, you can ask for a full refund. If your domain name is registered in the last 48 hours, you can also get a refund for it.
Will my images break?
No, they will not. When you transfer using the import file, all attached images are downloaded and the links are updated. However, there is one issue that we noticed: If your image URL starts with files.wordpress.com, then they can’t be converted. If you notice that the image URL has not changed and still points to WordPress.com, then we recommend that you use the import external images plugin to migrate your images risk-free.
I registered my domain through WordPress.com, can I still move?
Yes, you can. If you already have a domain name registered through WordPress.com, then you might only need a web hosting account. You can point that domain name to your new self-hosted WordPress site. Alternatively, you may transfer your domain name to a domain name registrar like NameCheap or Godaddy.
Will my website go down when I switch?
No! You can move your website with zero downtime by following our tutorial.
You can start tracking your self-hosted WordPress site by installing Google Analytics.
We hope this guide helped you seamlessly switch your WordPress.com site to self-hosted WordPress.org. You may also want to check out our step by step guides on how to transfer WordPress from local server to a live site and migrate from Medium to WordPress.
hello,
i had shifted my content from wordpress.com to wordpress.org and made my WordPress.com site private but recently i opened my wordpress.com account and found that the whole site has been changed according to wordpress.org . From theme to every word of content, it is as same as wordpress.org. Could you please tell the reason behind this?Is the domain still connected to wordpress.com??
I have bought the web host through hostgator.in . Please help us with this as soon as possible
Hi – I have followed the protocol for moving from wordpress.com to wordpress.org. When I log into WP from Bluehost it looks like I’m still at a temp domain, and my site hasn’t transferred. (It still exists at the URL though, so it’s not down.) How long until it’s imported and I can access it by logging in via Bluehost?
If your domain is redirecting to your temporary domain then you would need to modify the URLs under Settings>General to your domain and then use a plugin such as velvet blues to update any URLs that are pointing toward your temporary domain
We have tried to get my full content, images and all, from .com to .org we are only migrating because I am going to start podcasting, we have been racking our brains we did the zip file the transfer all of it, yet my pics do not show, my main pics like the actual header I made, some random image of a building in there and I can’t get rid of it, do you know what’s going on.
Hi,I moved my wordpress. Com to wordpress. Org as per the steps and made my .com as private as I don’t have any traffic there. My question is will still my content in .com site will be considered as duplicate content. Will that affect SEO of my new website?
Lathiya,
Since your wordpress.com blog is made private, it won’t affect your SEO
Hi,
I just make my wordpress.com account 3 months from now, Im not totally use it till now..I found that it is better to use wordpress.org for more privacy..Is it Ok to delete my account in wordpress.com and make new account in wordpress.org.?
You can follow this tutorial to move your site from WordPress.com to WordPress.org, instead of deleting it.
I use a WordPress.com and I have a premium plan which I upgraded from starter plan a week ago. Since I already have a dormain name and premium hosted plan for 1 year, can I still move to WordPress.org? The reason is because I want to be able to download some plugins like Yoast SEO and some themes. I don’t have money to upgrade to business plan where I can download them. Thanks. I forward to your response
Hey Steve,
You can move to WordPress.org, but you’ll have to purchase a different web hosting service, such as Bluehost or SiteGround, etc.