
Do you want to transfer your WordPress website from one domain name to another domain on the same server? Switching to a new domain name may affect the search engine rankings of your website. To minimize this impact, you’ll need to follow a specific step-by-step process to get your search position back after transferring your site.
In this article, we’ll show you how to properly move your WordPress site to a new domain name with minimal effect on SEO.
Step 0. Assess Your WordPress Site
Moving your WordPress site to a new domain name is a completely different process than switching your website from one web host to another. For the process covered in this guide, you’ll have the same web hosting but a new domain name. If you’re unsure which process you require, read our article on the difference between a domain name and web hosting.
Before we start, you should check that your WordPress website is working fine on your current domain name, and that you’ve successfully your new domain name. If you don’t have your new domain name yet, then you can buy it from any of the top domain name registrars on the market.
Make sure that you have the access to cPanel for your website and that you’re able to connect your site to an FTP client. Once you’ve double-checked all these factors, you can go ahead and begin the moving process.
Note: It’s important for you to know that a slight effect on your website traffic is normal when you switch domains. However, we’ll help you, step-by-step, to achieve your goals without losing control of your search engine rankings.
Ready? Let’s get started.
Step 1. Create a Complete Backup of WordPress
To start, you’ll need a complete backup of your WordPress site. You can find many WordPress backup plugins, but we highly recommend using the Duplicator plugin for this process.
Duplicator is a free WordPress backup and migration plugin.
The first thing you’ll need to do is to install the Duplicator plugin. If you need help, check out our guide on how to install a WordPress plugin.
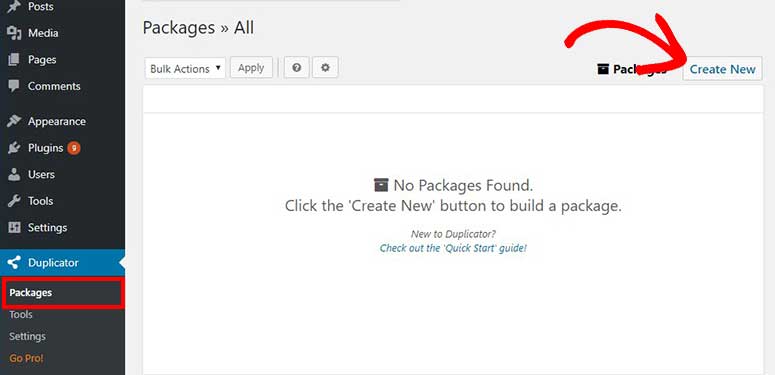
Upon activation, you’ll see a new ‘Duplicator’ menu in your website’s admin backend. You’ll need to go to the Duplicator » Packages page and create a new package.
On the next page, you can give a name to the new package, select the storage location, choose the archive type, and click on the ‘Next’ button.
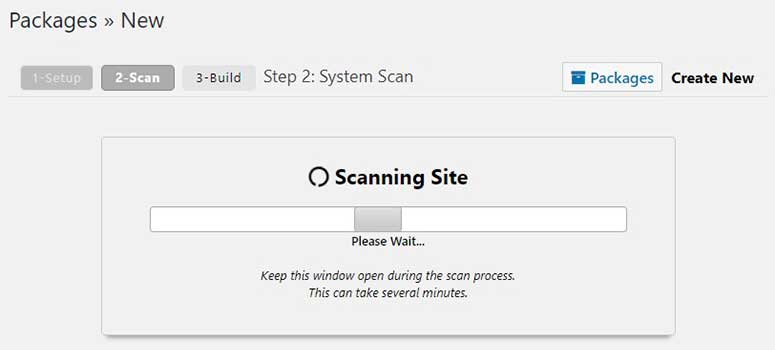
It’ll scan your website and you’ll need to wait for a few minutes until the scan is complete.
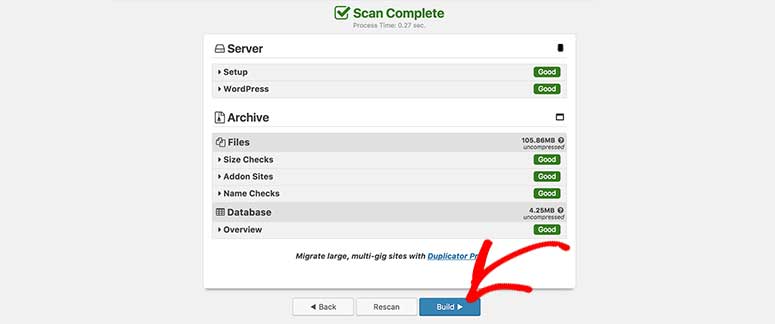
Once the scan has completed successfully, you can go ahead and hit the ‘Build’ button to create a complete backup of your WordPress website.
Depending on the size of your website and media files, it may take several minutes to complete the backup process.
When it’s successfully finished, you’ll find ‘Installer’ and ‘Archive’ files to download as a package. You can also click on the ‘1-Click Download’ option to download them instantly onto your computer.

In this package, you’ll have an Archive file which contains a duplicate version of your WordPress site. You’ll use this to switch your site to a new domain name. Whereas the Installer file can help you with automating and running the migration process.
Step 2. Set Up a Database for Your New Domain
You’ll need a database on your web hosting for your new domain name. This database will store the WordPress files and scripts for your website.
Note: If you have a database to spare, then you can jump to the next step directly. Otherwise, continue with this step.
You’ll need to log into your cPanel account to create a new database. Once logged in, you can go to the Databases » MySQL Databases option to continue.

Next, you’ll need to enter a name for the new database and hit the ‘Create Database’ button.

A new database will be created on your website’s cPanel account.
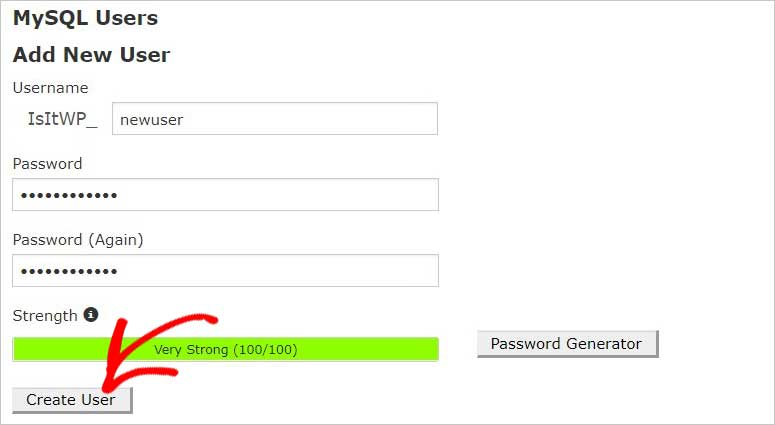
After that, you’ll need to jump to the MySQL Users section below. Enter the username, password, and click on the ‘Create User’ button.
Now you’ll have a new database and a new user. You need to link them together, so the user can work for the database.
In the ‘Add User to Database’ section, you’ll need to select the user that you just created and then you can select the new database. Click on the ‘Add’ button to link them.
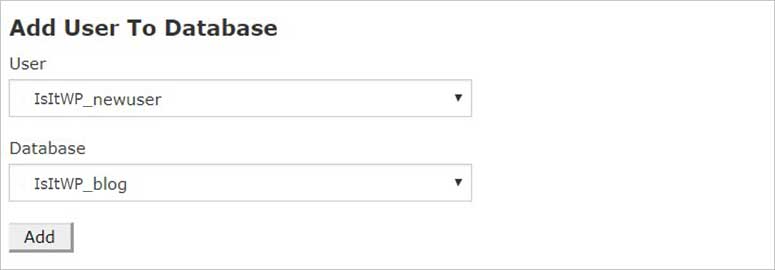
Once added, you’re ready to switch your website from your old domain name to your new domain name. Copy the information (including the database name, user, and password) on a notepad. You’ll need this later!
Step 3. Upload the WordPress Backup Files
You’ve got the ‘Installer’ and ‘Archive’ files downloaded on your computer.
Now you need to log into your new domain name with an FTP client. On the root directory, you can upload the Installer and Archive files.
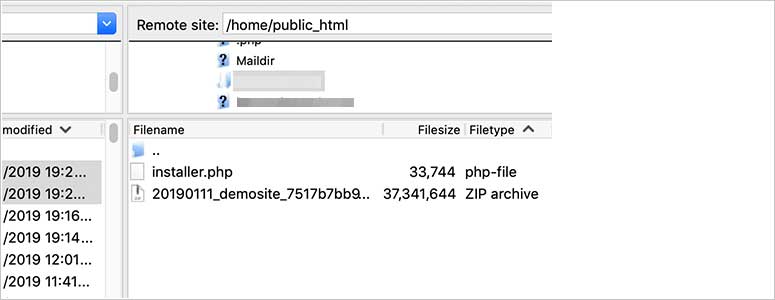
After uploading the files, you can go ahead and visit this URL on a browser tab:
http://newsite.com/installer.php
In this URL, ‘newsite.com’ will be replaced with your new domain name and installer.php can help with the migration as discussed above.
Once you run this URL, the migration process will begin automatically.
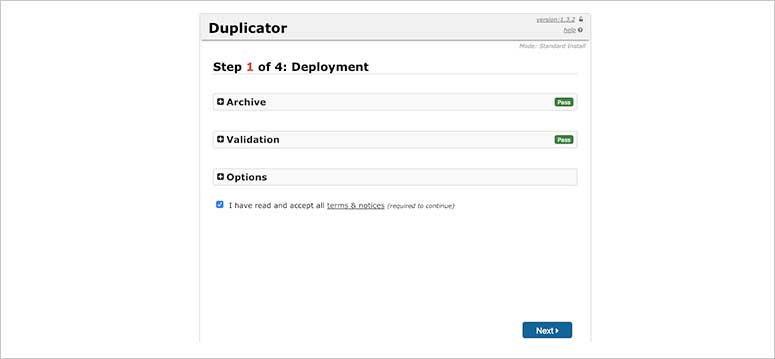
On the next screen, you can leave all the settings as-is. Start by checking the terms and conditions option. Click on the ‘Next’ button to continue.
Next, you’ll need to enter the database information.
In the Host field, you should enter ‘localhost’ and the other fields will get the details that you copied previously.
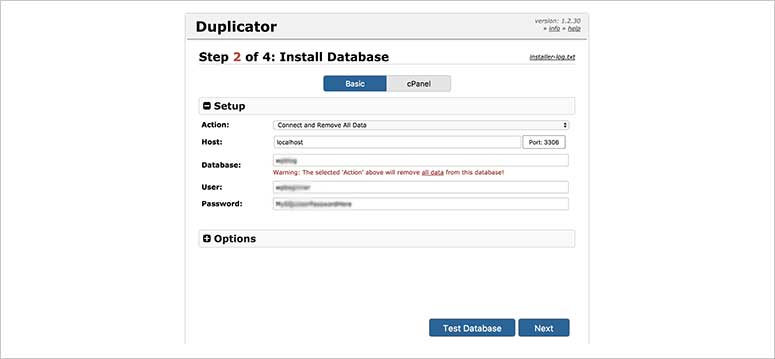
Make sure to click on the ‘Next’ button.
After that, it’ll upload your WordPress backup files to the database that you created for the new domain name.
It’ll display the new settings, including the URL, Path, and Title of your new domain. If the information is correct, then click on the ‘Next’ button.
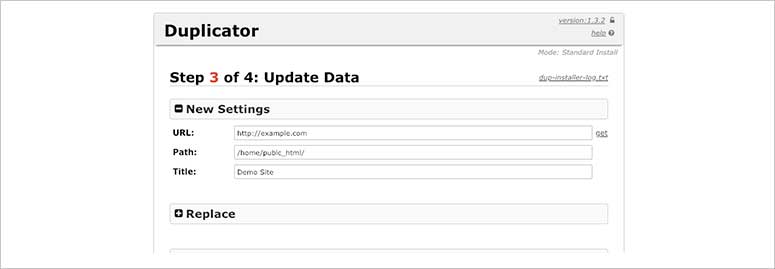
The process will be finished and your website will have moved successfully to your new domain name.

Last, you’ll see the ‘Admin Login’ button that will take you to the WordPress login page for your new domain name.
Step 4. Add Permanent Redirects
You’ve moved your website to your new domain name but search engines may still have traces of your old domain name. This can distract your users, and it’s also not good for your SEO.
To avoid this, you need to set up 301 permanent redirects.
The permanent redirects will make sure that your users who’re visiting from the old domain’s URL will be redirected to your new domain name automatically.
First, you’ll need to connect your old website using an FTP client. Look for the .htaccess file on your root directory and edit it.
You’ll need to add this code on top of the other code in your .htaccess file:
#Options +FollowSymLinks
RewriteEngine on
RewriteRule ^(.*)$ http://www.newsite.com/$1 [R=301,L]
In this code, you’ll need to change the URL (http://www.newsite.com/) to your new domain name.
The RewriteEngine will make sure that the visitors who’re landing on your old URL will be redirected to your new domain URL.
You can test the redirect by visiting your old domain name. It should automatically redirect you to your website on your new domain. If there’s an issue, then you can contact your web hosting provider to setup redirects.
Step 5. Inform Google About Change of Address
The redirect will help your users to see your website on your new domain name. You should also inform Google about this change, so Google can look for the new domain name and display it in their search results for your users.
Start by adding the new domain to the Google Search Console. You should check out this complete guide to Google Search Console for assistance.
After that, you’ll need to go to the old version of Google Search Console to use the ‘Change of Address’ tool.
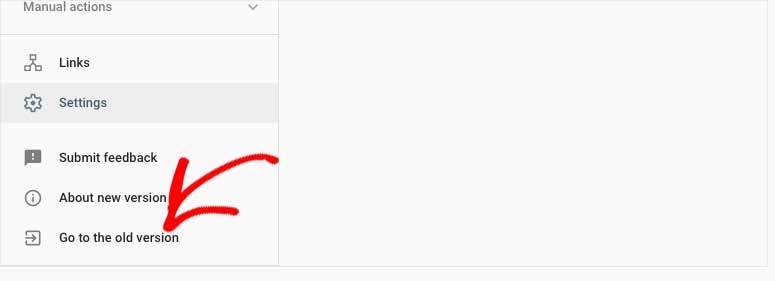
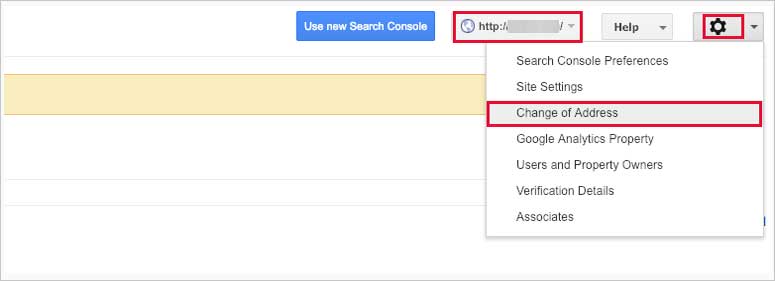
Simply switch to your old domain name in the dropdown next to the ‘Use New Search Console’ button. Then, click on the settings icon and select ‘Change of Address’.
This will launch the Change of Address tool. You can select your new website, test the permanent 301 redirects, and submit your site to inform Google about the change of address.
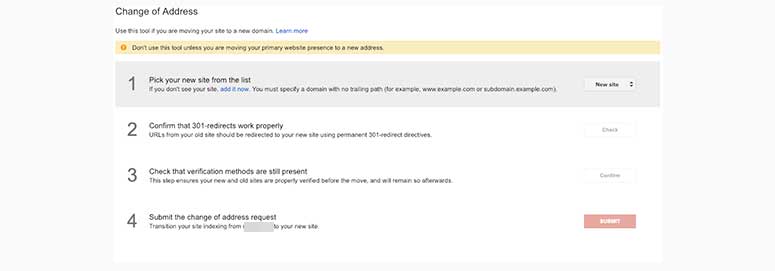
This step will let Google know about your recent switching of your site’s domain name, and it’ll become easier for the search engine to quickly crawl your new URL.
Step 6. Update Your Users
Following the above steps, you made sure that your users would be redirected to your new domain name. However, you can also inform them personally about this change to your site’s domain address.
The simplest way to do this is by posting an article with the update and share it on social media with your users. You can also send an update to your email list letting them know about the change.
In the email, you can ask your users to test your website and let you know if they find any issues. This will help your users remember your site’s new domain name, and you’ll get insights from multiple people.
Don’t miss this step by step article on how to transfer WordPress from local server to a live site.
We hope this guide helped you learn how to properly move your WordPress site to a new domain name. You may also want to check out our article on how to move your site from WordPress.com to WordPress.org without losing any data.

Very informative post but personally I find duplicator or plugins to move a website a nightmare, have spent hours in the past trying to get the to work because of lack or space or resources on the old server etc.
I prefer to use the straight forward way of using FTP to download / upload the files and a database backup then I have some SQL code to execute to change all urls or you can use the plugin Velvet Blues Update Urls. It never fails.